


-16- G5959Z 12" Left-Tilting Table Saw
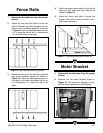
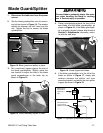
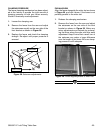
Figure 13. Setscrew on each corner of insert.
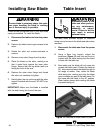
Table Insert
Disconnect power to the
table saw when perform-
ing any maintenance,
assembly or adjust-
ments. Failure to do this
may result in serious
personal injury.
!
Please review this section even if your saw blade
came pre-installed. To install the blade:
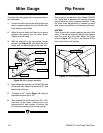
1. Disconnect the table saw from the power
source.
2. Remove the table insert to gain access to the
arbor.
3. Rotate the arbor nut counter-clockwise to
remove.
4. Remove outer arbor flange from the arbor.
5. Place the blade on the arbor, making sure
that it seats firmly against the inner arbor
flange. Ensure that the top blade teeth are
facing the front of the saw.
6. Replace the outer arbor flange and thread
the arbor nut clockwise to tighten.
7. Hand tighten the nut and snug with the arbor
wrench included with the saw. DO NOT over
tighten.
IMPORTANT: Make sure the blade is installed
with the teeth facing the front of the saw.
The saw blade is extremely sharp. Use extra
care when handling the blade or working
near it. Serious injury is possible.
Installing Saw Blade
The table insert provides support for materials
being cut and access to the blade and arbor when
removed.
1. Disconnect the table saw from the power
source.
2. Using a 6mm hex wrench, adjust the
setscrews (
Figure 13)
until they are firmly in
contact with the table casting and the insert
is flush with the table top.
3. Now make sure the blade will not come into
contact with table insert. Position the blade at
90°, then raise and lower the blade through its
full range of motion. Also, rotate the blade
while doing this, making sure that the blade
never contacts any part of the table insert. Do
the same with the blade in the 45° position.
Wear leather gloves while rotating the blade
to prevent being cut.