


Model T10687 (Mfg. Since 10/12)
-21-
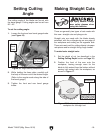
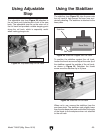
Note: The front and rear cutting indicator
arrows are only accurate when the blade is
fully extended. If the saw depth gauge is set,
the maximum cutting distance will be less.
4.
Engage the plunge release and lower the
blade slightly, but without touching the
workpiece.
5.
To activate the saw, engage the power trig-
ger while holding the plunge release.
Note: Holding the power trigger alone will not
activate the saw. For power to be activated,
both the plunge release and the power trig-
ger must be pressed. After power has been
activated, the plunge release can be disen-
gaged.
Let the saw reach full speed before contact-
ing the workpiece. Doing so will reduce the
risk of kickback, help provide the cleanest
cut, and reduce stress on the saw motor.
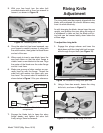
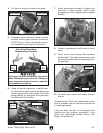
Figure 19. Cutting indicator arrows.
Rear
Arrow
Center
Arrow
Front
Arrow
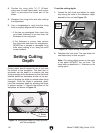
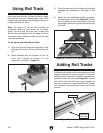
3. Align the start cut-point with the rear cutting
indicator arrow (see Figure 19). This arrow
marks the maximum rear cutting distance the
blade will travel when fully extended.
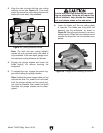
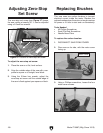
6.
Lower the blade until the set cutting depth
is reached. The blade and riving knife will
descend into the workpiece, as shown in
Figure 20. Move the saw forward in an even,
steady motion. When the front indicator arrow
reaches the stop point, the cut has been com-
pleted.
Figure 20. Plunge-action lowering for the cut.