


Page 11For technical questions, please call 1-800-444-3353.SKU 32650
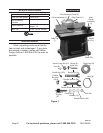
Removing or Installing the Shaper
Spindle
The Shaper/Router is packaged with the
Shaper Spindle (47) installed so that the
unit is ready for use as a shaper. To use
the unit as a router, the Shaper Spindle
must be removed. Reinstall the Shaper
Spindle when using shaper cutters.
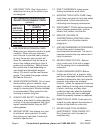
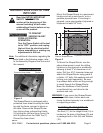
To remove the Shaper Spindle:
H
Figure 7
Double
Ended
Wrench
(55)
Main
Spindle
(43)
Shaper
Spindle
Nut (46)
Shaper Spindle (47)
Spindle
Wrench
(54)
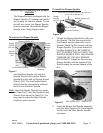
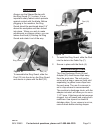
a) Hold Main Spindle b) Turn Counter-
clockwise
old the Main Spindle (43) with the
Spindle Wrench (54) and the Shaper
Spindle Nut (46) with the Double Ended
Wrench (55). Turn the Double Ended
Wrench counter clockwise to unthread
the Nut from the Main Spindle.
Note: Insert the Spindle Wrench from under
the Table Top (7) and the Double Ended
Wrench from above the Table Top. You
may need to adjust the Main Spindle
height for easier access.
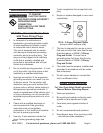
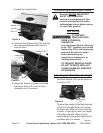
To Install the Shaper Spindle:
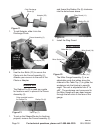
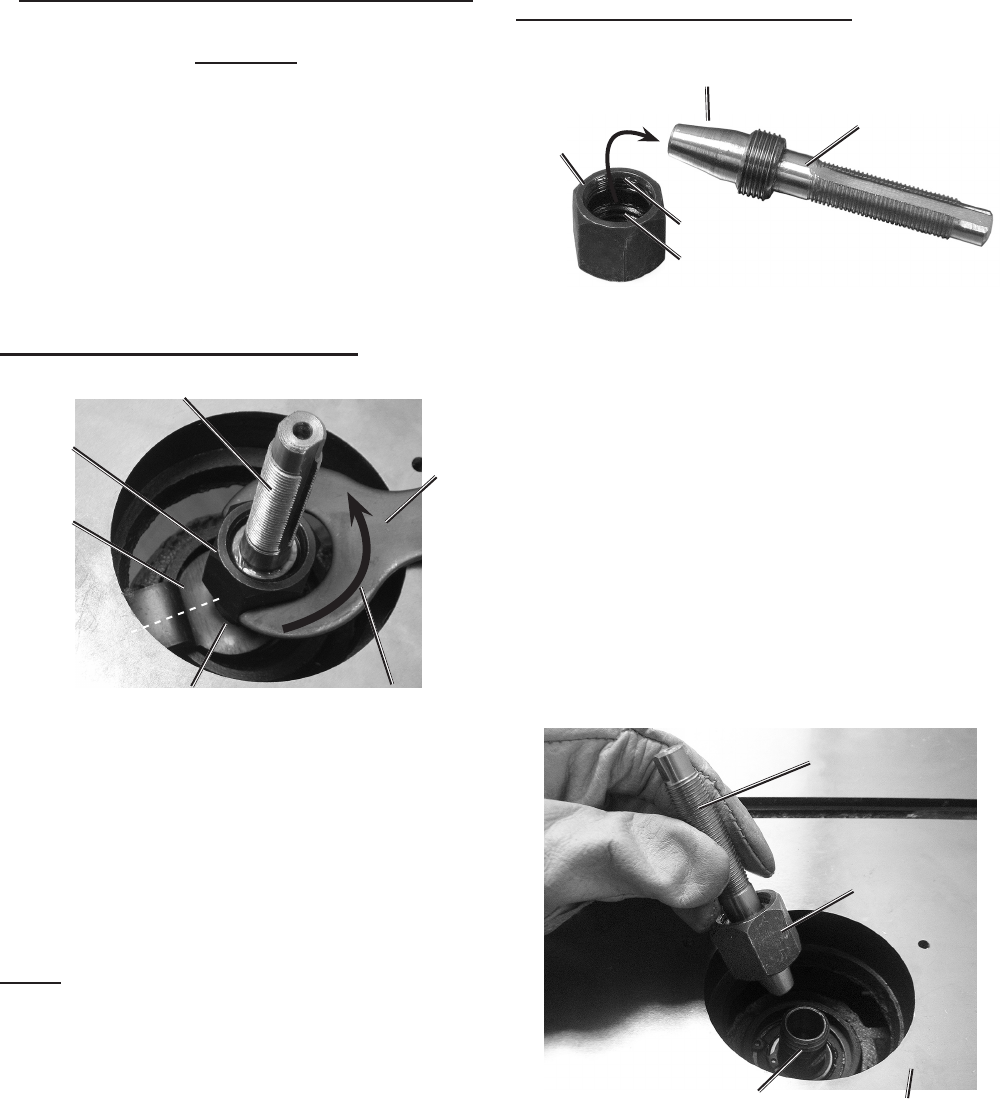
Figure 8
Shaper
Spindle
Nut (46)
Shaper Spindle (47)
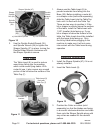
Thread the ne threaded end of the Nut (46) onto
this end of the Spindle (47).
Course Threads
Fine Threads
1. Thread the Shaper Spindle Nut (46) onto
the Spindle. The Nut has one end with
ne threads and the other with course
threads. Match the ne threads with the
Shaper Spindle. (The course threads t
the Main Spindle (43)). BE CAREFUL
NOT TO SCREW THE NUT ONTO THE
SHAPER SPINDLE WITH THE COARSE
THREADS OR YOU WILL DAMAGE
BOTH PARTS. Thread the Nut onto the
Shaper Spindle until the threads of the
Spindle reach the coarse threads of the
Nut.
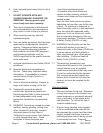
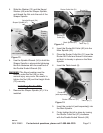
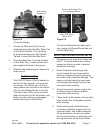
Figure 9
Shaper Spindle (47)
Table Top (7)
Shaper Spindle
Nut (46)
Main Spindle (43)
2. Insert the Shaper Nut/Spindle assembly
onto the Main Spindle (43). Hand tighten
the Nut onto the Main Spindle threads
clockwise.
REV 10e