


Page 14 For technical questions, please call 1-800-444-3353. SKU 32650
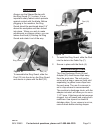
while holding the Main Spindle with the
Spindle Wrench (54)
Note: With the Table Insert (8) in place, you
will need to use both wrenches from
below the Table Top (7). You may need
to adjust the height of the Main Spindle
with the Height Knob (16) to best access
the Main Spindle and Router Collet Nut.
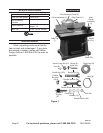
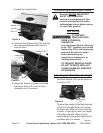
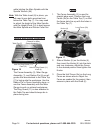
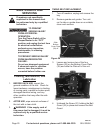
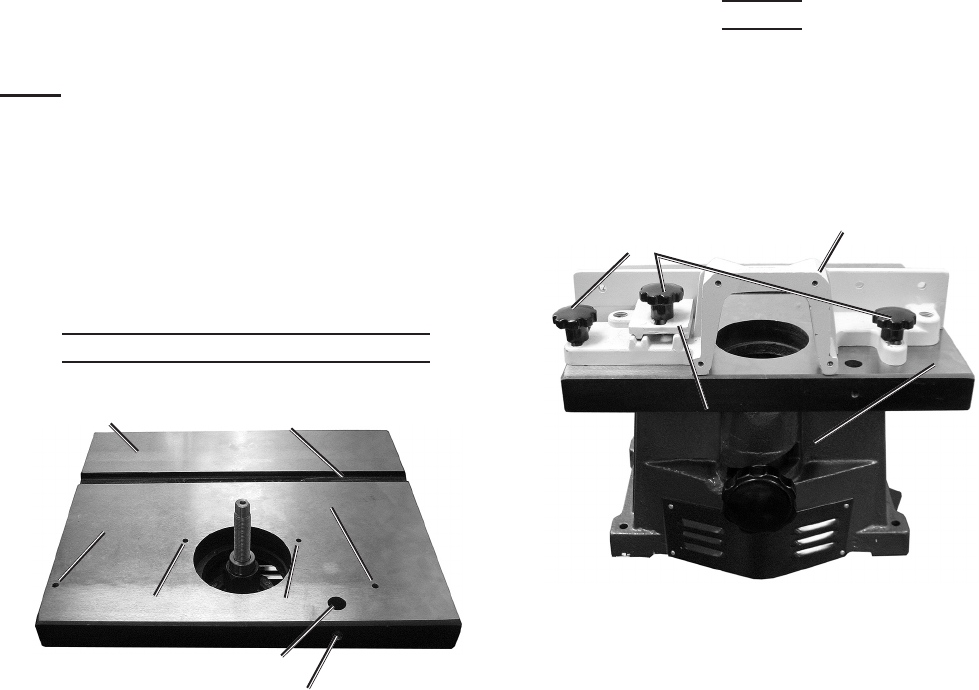
Guard and Guide Locations
Figure 16
Table Top (7)
Holes for Fence Assembly (2)
Knobs (4)
Channel for Miter
Gauge Assembly (1)
Hole for Ring Guard (11)
Post (12)
Hole for Ring Guard (11)
Knob (4)
Holes for Radius Pin (6)
The Fence Assembly (2), Miter Gauge
Assembly (1), and Radius Pin (6) are all
guides that are attached to the Table Top
(7) to help guide the workpiece. Use the
Radius Pin or Fence Assembly alone, or
use the Fence Assembly with the Miter
Gauge to work on mitered workpieces.
The Ring Guard (11) is also attached to
the Table Top and should always be in
place during use.
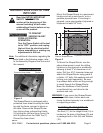
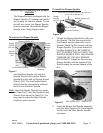
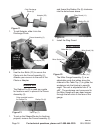
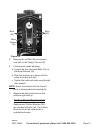
Fence
The Fence Assembly (2) is used for 1.
straight edge work. Position the Long
Fence (2b) on the Table Top (7) so that
the fence slots line up with the holes in
the Table Top (7).
Long Fence (2b)
Half Fence (2a)
Knobs (4)
Table Top (7)
Figure 17
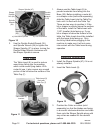
2. Slide a Washer (5) on the Knobs (4),
then insert the Knobs (4) into the slots
and turn clockwise. Adjust the Fence
to the desired position then tighten the
Knobs.
Place the Half Fence (2a) on the Long 3.
Fence as shown above. Adjust the
Fence as needed for the project, then
secure in place with the Knob (4).
REV 10e