


Page 9For technical questions, please call 1-800-444-3353.SKU 32650
INSTRUCTIONS FOR PUTTING
INTO USE
Read the ENTIRE IMPORTANT
SAFETY INFORMATION
section at the beginning of this
manual including all text under
subheadings therein before set up
or use of this product.
TO PREVENT
SERIOUS INJURY
FROM ACCIDENTAL
OPERATION:
Turn the Power Switch of the tool
to its “OFF” position and unplug
the tool from its electrical outlet
before assembling or making any
adjustments to the tool.
Note: For additional information regarding the
parts listed in the following pages, refer
to the Assembly Diagram near the end of
this manual.
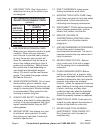
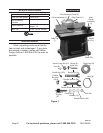
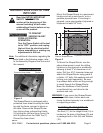
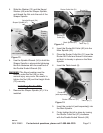
Assembly/Mounting
Figure 2
Fence (2)
Protective foam sheet
Knobs
(4)
The Shaper/Router is packaged with a
protective foam sheet covering the table
top and the fence, secured in place on
the table. Remove the Shaper/Router
from the box then unthread the Knobs
(4) holding the Half and Long Fence (2a
and 2b) pieces from the Table Top (7).
Discard the foam sheet.
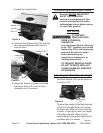
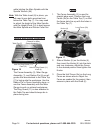
Mounting
Mount the Shaper/Router to a permanent
location such as a work bench, or to a
portable plywood base. If mounting to
plywood, use a good grade of plywood or
chipboard at least 3/4” thick.
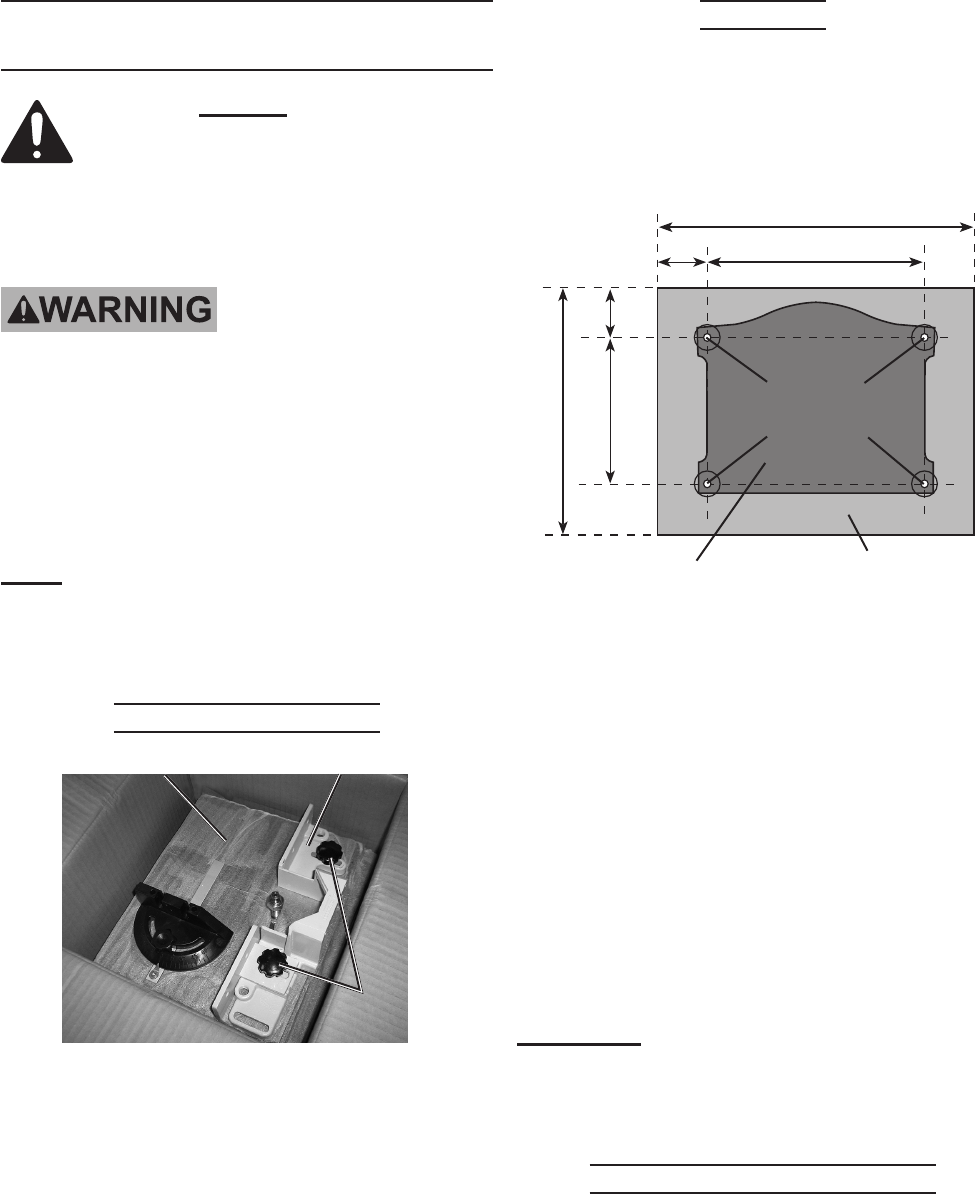
Plywood or workbench
Base of Shaper/Router
14-1/8”
10-1/8”
5-11/16”
9-11/16”
2”
2”
Four 5/16”
Diameter holes
Figure 3
To Mount the Shaper/Router, use the
above dimensions to mark the drilling
locations on the plywood or workbench,
allowing at least 2” of clearance on all
sides. Drill four 5/16” diameter holes and
attach the Shaper/Router using grade 5
or better 1/4” bolts, at washers and self
locking nuts (sold separately). Be sure
to purchase bolts which are long enough
to reach through the Shaper/Router
Base, the thickness of the Plywood
or workbench top, and allow for the
washers and nuts.
WARNING: If you mount the Shaper/Router
on a portable base, before each use,
clamp the board securely to a workbench
or supporting surface.
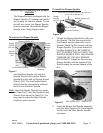
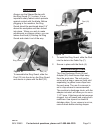
Installing the Height Knob
The Stud (17) for the Height Knob (16) is
located on the back of the Base (25) and
is packaged with a Nut (56) and Washer
(18).
REV 10e