Page 19For technical questions, please call 1-800-444-3353.SKU 32650
Straight Edge Shaping
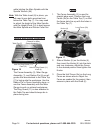
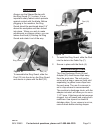
Position fence faces so that they are
parallel to each other and lock them into
place after installing shaper. Position the
shaper so that one of the cutting faces
is 90° from the fence faces. To get an
idea of the prole of the cut, place the
workpiece against the infeed fence and
slide it against the face of the cutter. Set
fence location and adjust spindle height
to give the approximate cut prole. Try
out the setting on a piece of scrap. Shut
off and unplug router when about 2” of
test piece is adjacent to the outfeed side
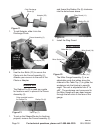
of fence. Clamp scrap. Loosen the three
knobs holding the fence and segment.
Slide both fence faces until they support
the workpiece entirely. Tighten all of the
knobs and resume test cut.
Irregular And Curved Shaping
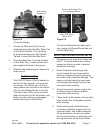
Remove fence assembly and replace
it with Radius Pin (6) and a collar (sold
separately). The Collar can either be
of the bell bearing or solid variety and
is mounted below or above the shaper
cutter on the Shaper Spindle (47) in
order to set the depth of cut. There are
two methods for shaping irregular and
curved edges:
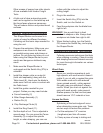
Pattern - This way is best when more c.
than one piece is being cut in the same
shape. A template can be cut from 1/4”
scrap. Allow for collar diameter, contour
shape and depth of cut. Cut workpiece
as close as possible to desired nal
shape. Fasten your template to the
workpiece using glue, brads, screws,
or clamps. Feed into the cutter until the
collar contacts the template. Slowly feed
the workpiece around the template,
holding the template tight against the
collar.
Collar - If at least 1/8” of your edge d.
can remain uncut, this method can be
used. As above, cut your workpiece as
close as possible to the desired shape.
Rest it against the radius pin and feed
into cutter until nished edge is against
collar. Keep your edge at a 90° angle to
the collar. Hold rmly against the collar
and slowly feed around the shape until
you are done.
REV 10e


