


OM-494 Page 38
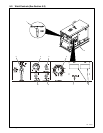
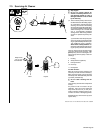
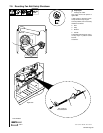
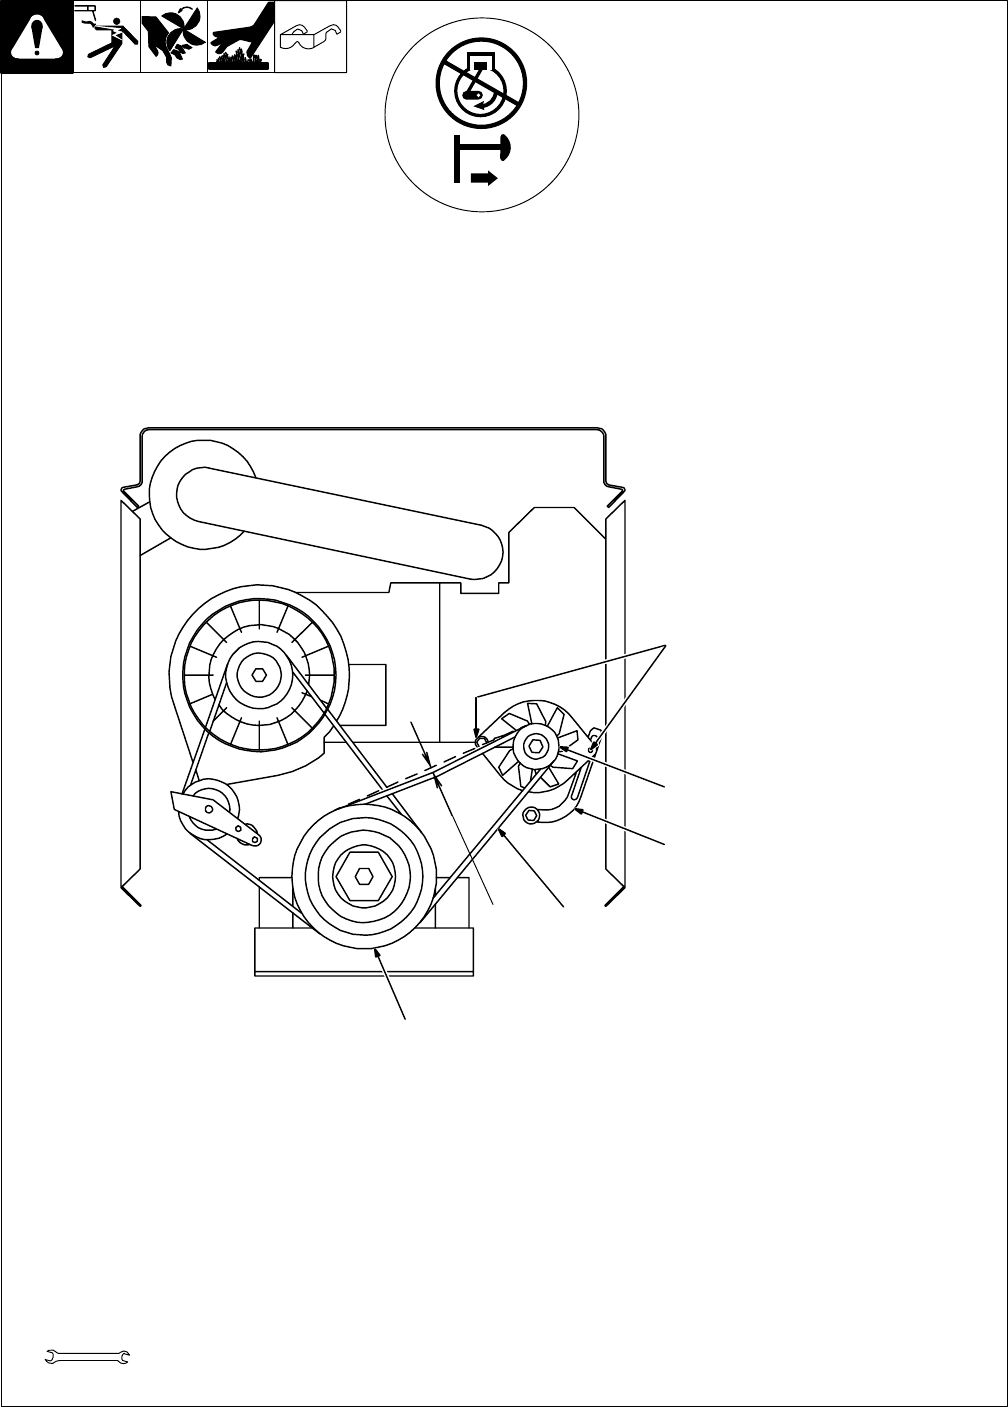
7-7. Checking And Replacing Alternator Belt
158 632 / Ref. 190 377
Y Stop engine.
To check belt tension:
Remove rear panel.
1 Alternator V-Belt
2 Crank Pulley
3 Alternator Pulley
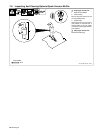
Place straight edge along top of pul-
leys. Pull down belt as far as it will
go, then measure distance from
belt to straight edge.
If measurement is less than 1/2 in
(13 mm), belt is okay. If not okay,
adjust belt tension.
To adjust belt tension:
4 Hex Nuts (2)
5 Alternator Bracket
Loosen nuts. Pivot alternator until
belt is tight. Tighten nuts. Recheck
tightness of belt. Readjust if
necessary.
Replace belt if damaged or
cracked.
To replace belt:
Loosen hex nuts and pivot alterna-
tor clockwise. Remove belt.
Install new belt, pivot alternator until
belt is tight, and tighten nuts. Re-
check tightness of belt after running
engine 15 minutes.
Reinstall rear panel.
1
1/2, 11/16 in
1/2 in
(13 mm)
Max
4
3
5
2
Tools Needed: