B-12
OPERATION
B-12
MAKING A WELD
1. Use only constant voltage power type sources. If
using a multiple process power source, be sure it
is set for constant voltage output per instructions
in the manual for the power source.
2. Set the power source polarity switch or properly
connect the electrodes and work leads for the
correct electrode polarity.
3. Set the voltage using the control on the power
source or, if used, the optional K589-1 Remote Kit
or K857 Remote Voltage Control. Set the open
circuit voltage to approximately 2 volts higher
than the desired procedure voltage. The final
setting must be made according to the arc voltage
while welding.
4. Use the Mode Selection key to set the desired
operating mode.
5. Use the Function Selection key and Selection
Setting arrow keys to set the desired Inch and
Weld Feed speeds.
6. Use the Time Selection key and Selection Setting
arrow keys to set the desired timers.
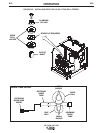
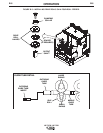
7. Inch the electrode through the gun and cable. For
solid wire, cut the electrode within approximately
3/8 in. of the end of the contact tip. If using cored
wire, cut the electrode within 3/4 in. of the
extension guide.
8. Connect the work cable to the metal to be welded.
The work cable must make good electrical
contact with the work. The work must also be
grounded.
When using an open arc process, it is necessary to
use correct eye, head, and body protection.
------------------------------------------------------------------------
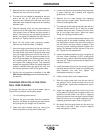
9. Position the electrode over the joint. The end of
the electrode may be lightly touching the work.
10. Lower your welding helmet. Close the gun trigger
and begin welding. Hold the gun so the contact tip
to work distance gives the correct electrical
stickout as required for the procedure being used.
11. To stop welding, release the gun trigger and then
pull the gun away from the work after the arc goes
out.
WIRE REEL CHANGING
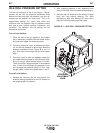
At the end of a coil, remove the last of the old electrode
from the conductor cable. Either pull it out at the
nozzle, or use the following procedure:
1. Cut off the end of the electrode at the gun end. Do
not break it off by hand. Breaking by hand puts a
slight bend in the wire, making it difficult to pull it
back through the nozzle.
2. Uncouple the gun conductor cable from the
conductor block on the wire feeder drive unit and
lay the gun cable out straight.
3. Using pliers, grip the wire and pull it out of the
cable from the connector end.
4. After the electrode has been removed, connect
the gun conductor back to the wire feeder.
5. Load a new reel of electrode per the instructions
for the specific reel type given previously in this
section.
LN-742 & LN-742H
WARNING


