


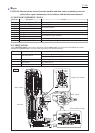

P 10/20
Repair
[3] DISASSEMBLY/ASSEMBLY
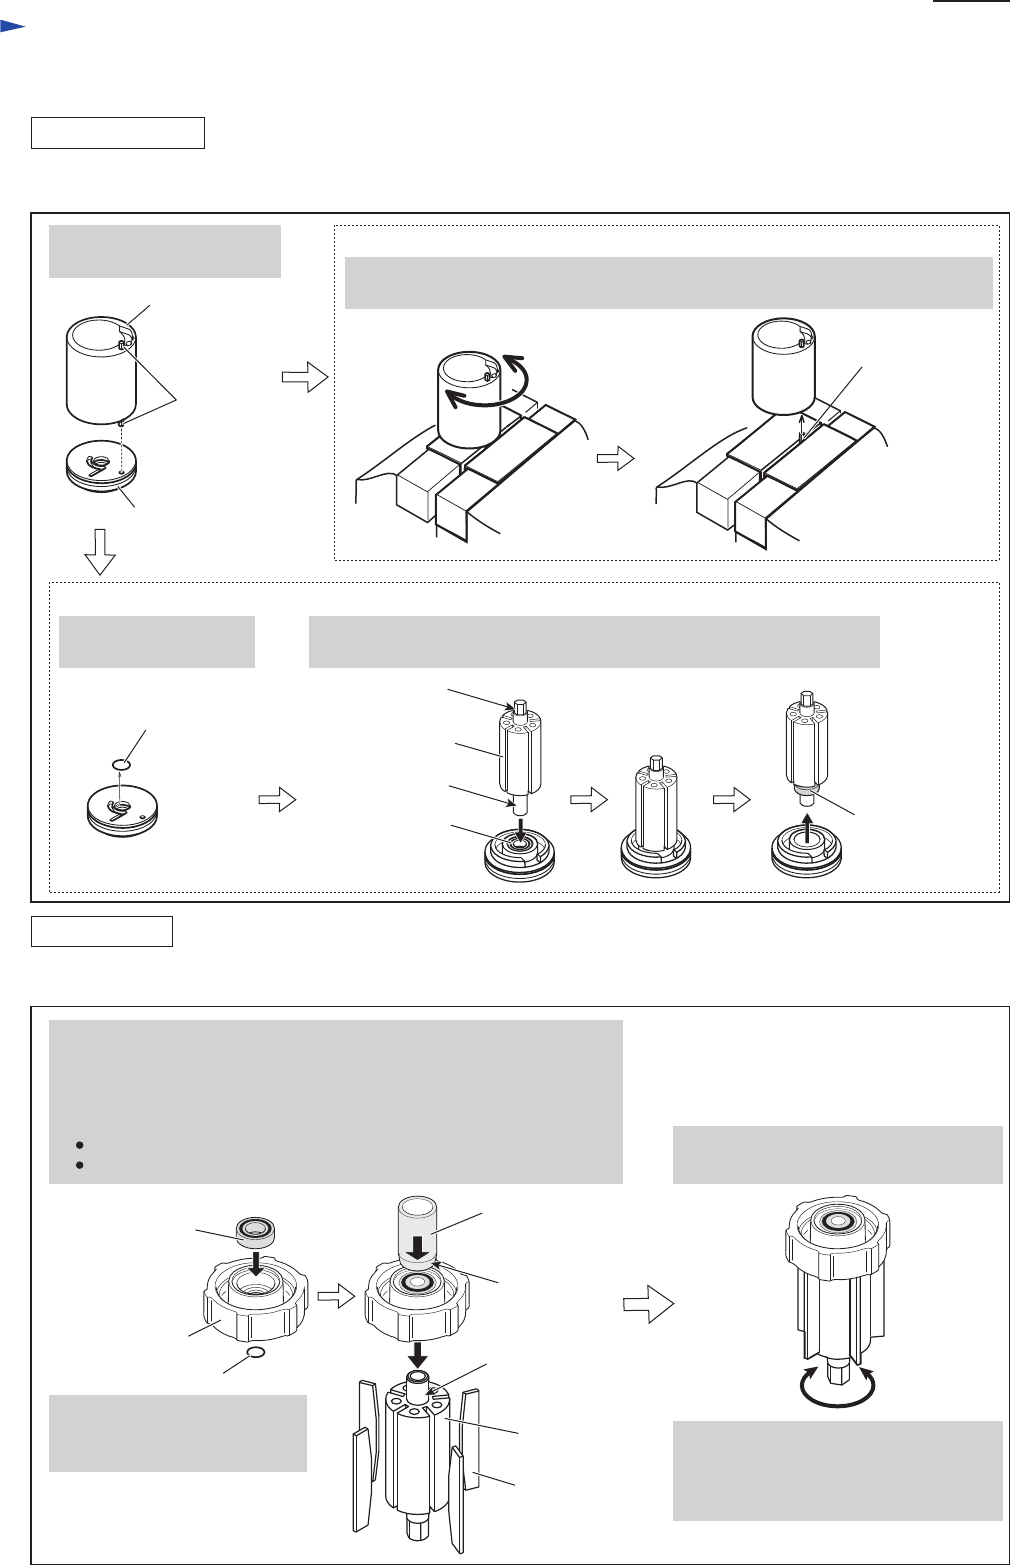
[3]-5. Air Motor Section
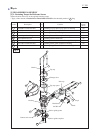
Fig. 18
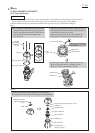
Fig. 19
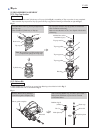
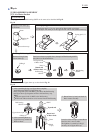
Separate Lower drum cap
from Drum.
Clamp Spring pin 2.5-5 in vise, then pull up Drum while swiveling it
left and right. The other pin on the opposite side can be removed the same way.
Spring pin
2.5-5
Lower drum cap
Upper drum cap
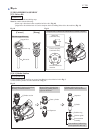
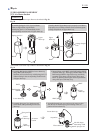
Remove O ring 9 from
Lower drum cap.
Spring pin 2.5-5
6) Spring pin 2.5-5 and Ball bearing 689ZZ can be removed as described in Fig. 18.
O Ring 9
Turn Lower drum cap upside down, then pull off Ball bearing 689ZZ
using Rotor as illustrated below.
Rotor
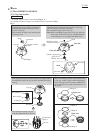
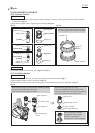
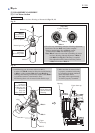
1. After assembling O ring 9 on Upper drum complete,
put Ball bearing 689ZZ in Upper drum cap.
Then, using arbor press and 1R027, press down the Ball bearing
and Upper drum cap altogether on Rotor shaft until they stop.
Note:
Apply the tapered end of 1R027 to the Ball bearing.
Round end of Rotor shaft has to be inserted into the Ball bearing.
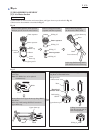
2. After assembling Rotor to
Upper drum cap, mount five
Blade to Rotor.
1R027
1) Assemble Rotor to Upper drum cap as described in Fig. 19.
3. Rotate Rotor by hand, and check if
Rotor rotates smoothly.
It may be a little bit tight to rotate Rotor.
However, this is not a trouble.
The tightness is caused by O ring 9
correctly set in Upper drum cap.
Tapered end
Ball bearing
689 ZZ
Blade
(5 pcs)
Ball bearing
689ZZ
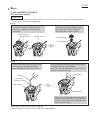
ASSEMBLING
DISASSEMBLING
Drum
Removing Ball bearing 689ZZ from Lower drum cap
Ball bearing
689 ZZ
Rotor
Hexagonal end
of Rotor shaft
Round end
of Rotor shaft
Removing Spring pin 2.5-5 from Drum
Round end
of Rotor shaft
O Ring 9