


P 7/20
Repair
[3] DISASSEMBLY/ASSEMBLY
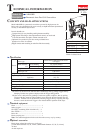
[3]-3. Driver Bit
Fig. 10
Fig. 12
Do the reverse of the disassembling steps.
Note: Be careful with the following:
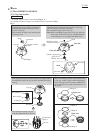
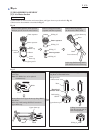
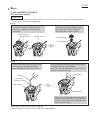
Piston cap is directional when assembled to Driver bit. (Fig. 10)
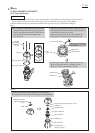
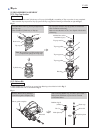
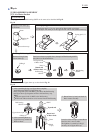
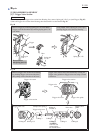
Align Driver bit with the hole of Carrier complete when assembling Driver bit to the machine. (Fig. 11)
Stepped face
Piston cap
Driver bit
Fig. 11
Driver bit
[sectional view]
Carrier complete
[sectional view]
Hole for Driver bit
insertion
Align the flats of Driver bit with the hole of Carrier complete.
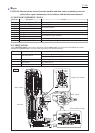
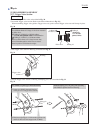
[3]-4. Cylinder Section
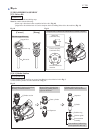
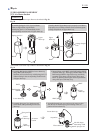
1) Disassemble Top cap and Top cap spacer from Housing as described on left in Fig. 3.
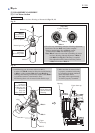
2) Disassemble Cylinder section as described in Fig. 12.
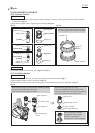
Remove Outer cylinder from
Separator by pulling them in
opposite directions.
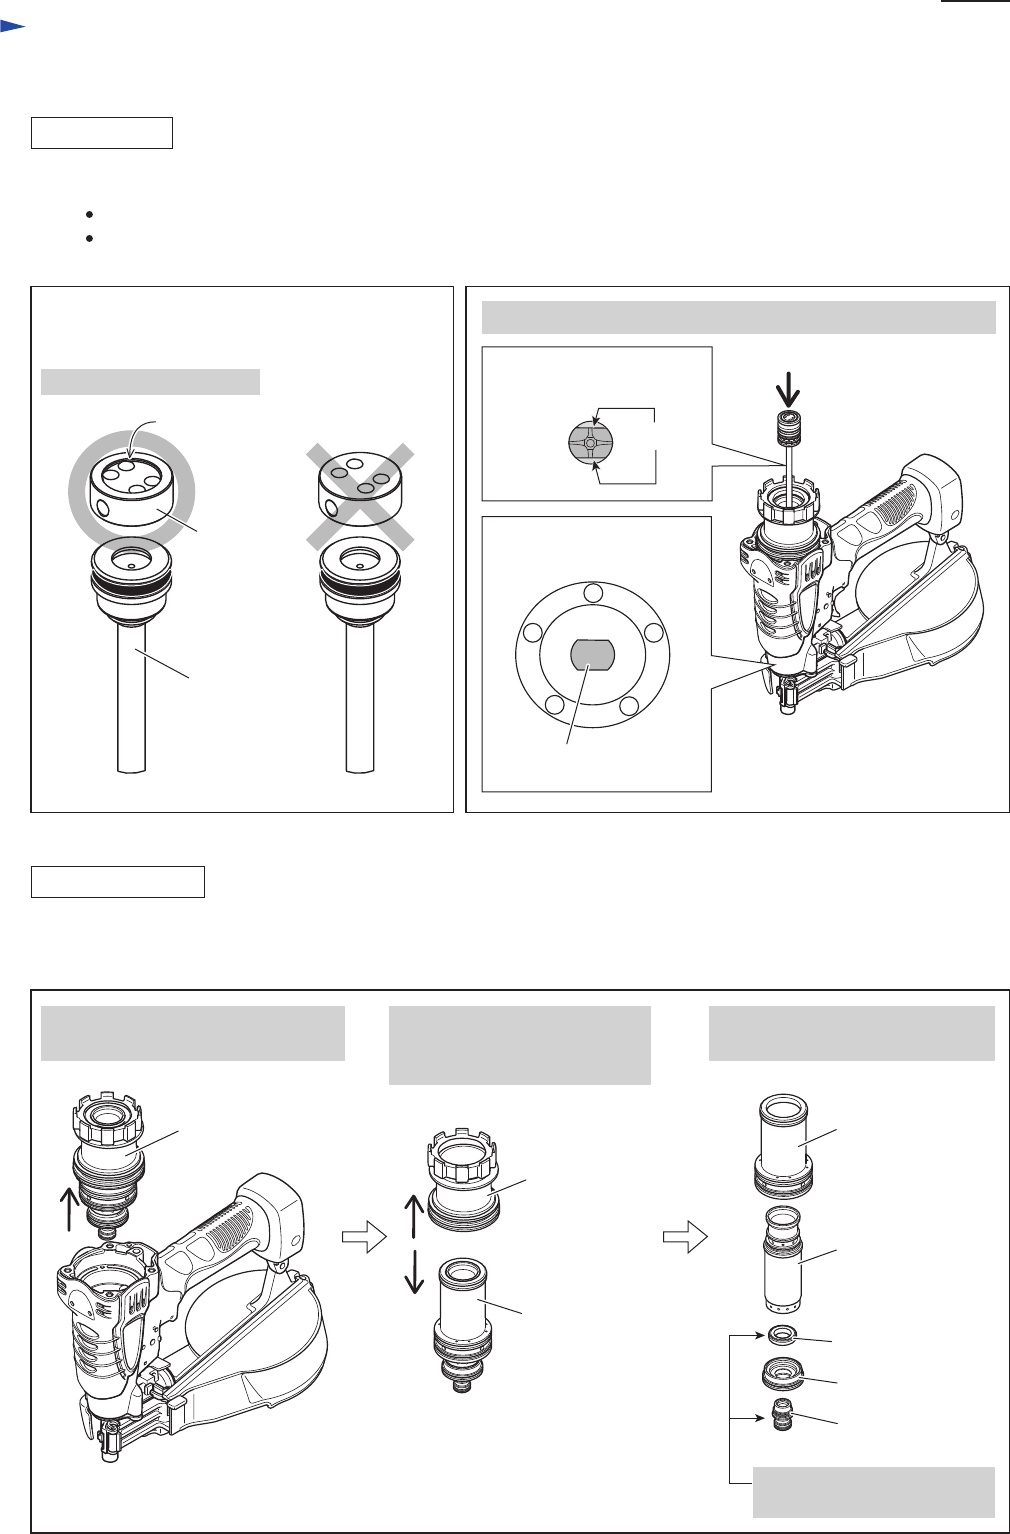
Outer cylinder
Separator
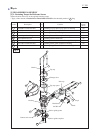
Separator
Cylinder
Cushion guide
Front cushion
assembly
Front cushion, Cushion ring
can be replaced in this step.
Cushion ring
Cylinder section
Disassemble Cylinder section from
Housing as illustrated below.
Cylinder section can now be
disassembled as illustrated below.
ASSEMBLING
DISASSEMBLING
[Correct] [Wrong]
With the stepped face up
flats