


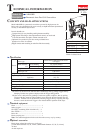

Compression
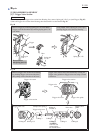
spring 4 (8 pcs)
P 4/20
Repair
[3] DISASSEMBLY/ASSEMBLY
[3]-2. Top Cap Section
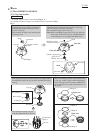
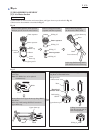
1) After removing Top cap and Top cap spacer from Housing, remove Head valve and Cylinder stay from Top cap
using air duster to blow air into the space between Top cap and Head valve using air pressure. (Fig. 3)
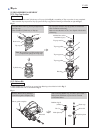
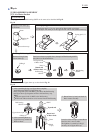
2) Remove Knob from Top cap, then disassemble the other parts from Top cap as illustrated in Fig. 4.
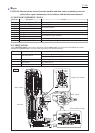
DISASSEMBLING
Cylinder stay
Head valve
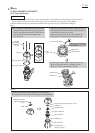
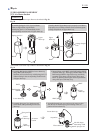
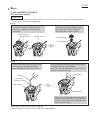
1. By removing four M5x80 Hex socket head bolts
using 1R299, separate Top cap, Top cap spacer
and Top cap gasket from Housing. Then remove
Top cap and the other Top cap gasket from
Top cap spacer.
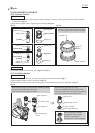
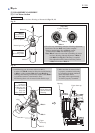
2. Turn Top cap upside down, then press down Head valve
and Cylinder stay firmly into Top cap with your palm
to make the air pressure as possible.
While pressing down Head valve and Cylinder stay,
insert nozzle of air duster into the hole of Top cap.
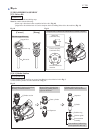
M4x8 Hex socket
button head bolt
(1 pc)
Cylinder stay
Head valve
Knob
By removing M4x8 Hex socket button head bolt and Knob,
the inner parts can be removed from Top cap as illustrated below.
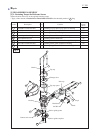
Conical compression spring 10-15
O Ring 6
Change valve
Fig. 3
Fig. 4
Flat washer 19
Rear cushion
O Ring 22
Seal ring 22
Top cap
M5x80
Hex socket
head bolt
(4 pcs)
Top cap gasket
Top cap spacer
Insert nozzle of air duster
into this hole.
3. By blowing air into the space between Top cap and
Head valve through the hole, Cylinder stay and
Head valve can be separated from Top cap.
Nozzle of air duster
Top cap