


P 4/ 20
Repair
[3] DISASSEMBLY/ASSEMBLY
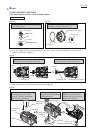
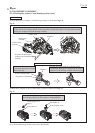
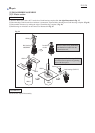
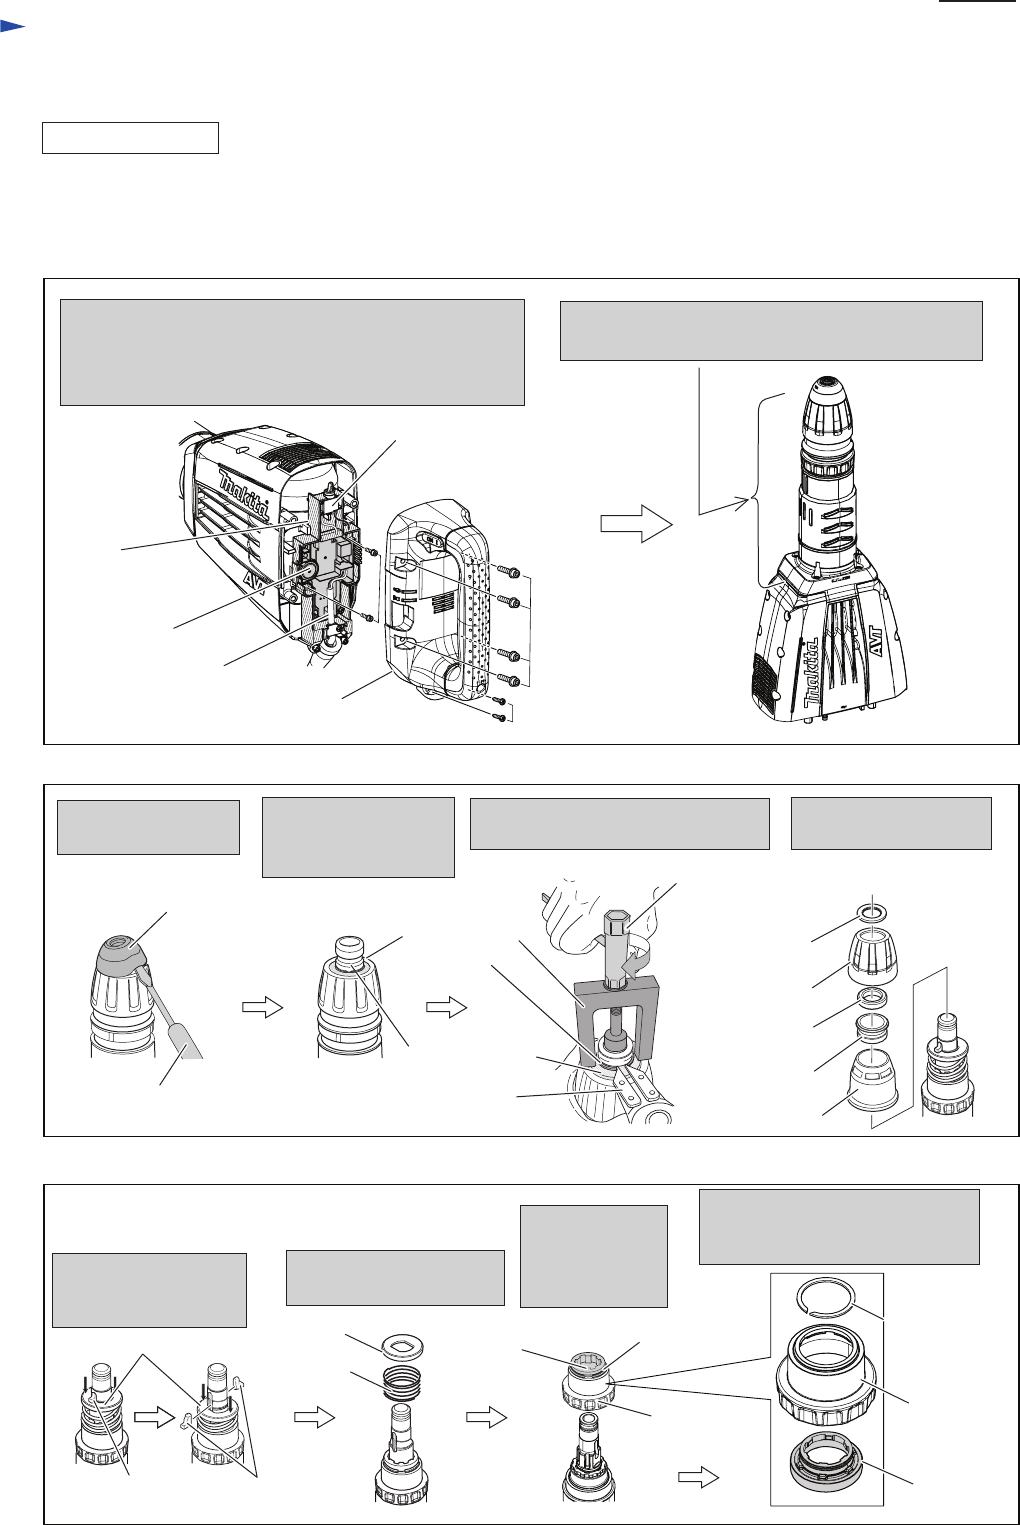
[3]-1. Chuck section
DISASSEMBLING
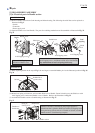
Controller
cover
Handle section
Tool holder cap
Ring
spring 26
Flat washer 30
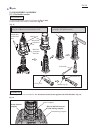
Pressing down Flat Washer 30 with
1R363, remove Ring spring 26.
1R363
Socket
Wrench 13
Chuck cover
Release cover
slotted head screwdriver
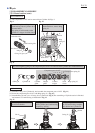
You can stand the Machine for easy repairing
of these sections.
Remove Tool holder
cap.
Ring spring 26, Flat
washer 30 and Tool
holder come into sight.
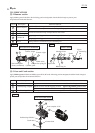
Separating Handle section, remove Controller cover by
disconnecting Controller’s connector from Brush holder
unit. Electrical parts (Switch, Controller, Power supply
cord) can be removed as a unit.
M6x30 Hex
socket head
bolt (4pcs.)
4x18 Tapping
Screw (2pcs.)
Controller
Switch
Remove Handle section and Controller cover so that you can stand the machine for easy repairing of the section except
Motor and Crank section. See Fig. 2.
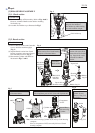
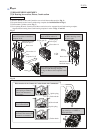
Chuck section can be disassembled as illustrated in Figs. 3 and 4.
Power supply cord
Fig. 2
Fig. 3
Fig. 4
Flat washer 30
Rubber ring 30
Chuck ring
1R212
The following parts can
be removed.
Tool retainer
Spring guide
Tool retainer
Remove Tool retainer,
pressing down Spring
guide.
Remove Spring guide and
Compression spring 56.
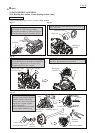
Remove Change
ring cover.
Change ring will
come with it.
Spring guide
Compression
spring 56
Change
ring
Retaining ring
WR-45
Retaining ring
WR-45
Change
ring cover
Change
ring cover
Change
ring
Remove Retaining ring WR-45.
Change ring can be separated
from Change ring cover.