


OM-842 Page 39
7-2. Diagnostics Program
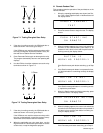
When the diagnostics program starts, the following series of in-
formational displays is shown:
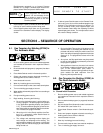
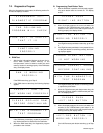
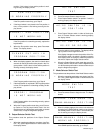
* SYNCROWAVE 35 1 *
DIAGNOSTIC PROGRAM
THE FOLLOWI NG
PROGRAM WI LL CHECK
YOUR UN I T TO VER I FY
THAT I T I S
FUNCT I ON I NG
PROPERLY
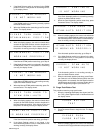
A. RAM Test
1. After the four informational displays are shown, the in-
ternal RAM (random access memory) of the
microprocessor control is tested to make sure each
memory location is working properly. If the RAM tests
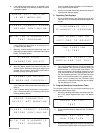
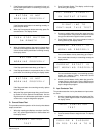
okay, the display shows:
RAM I S WORK I NG
PROPERLY
If the RAM tests okay, go to Step 3.
2. If the RAM does not test okay, the following displays
appear:
ERROR!!! RAM IS
NOT WORK I NG PROPERLY
PLEASE REPLACE RAM
BEFORE CONT I NU I NG
WI TH THE DI AGNOST IC
TEST PROGRAM
If the RAM does not test okay, contact the nearest Fac-
tory Authorized Service Station/Service Distributor.
3. When the RAM tests okay, the diagnostics program
proceeds to the next test.
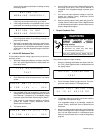
B. Programming Push Button Tests
1. After the RAM test is passed, the front panel program-
ming push button tests are carried out. The display
shows:
PLEASE PUSH
RIGHT/ INC BUTTON
2. When this display appears, the control unit waits nine
seconds for the Right/Increase push button to be
pressed. If this is done in time and the push button is
working properly, the display shows:
RIGHT/ INC BUTTON IS
WOR K I NG PROP ER L Y
If the Right/Increase push button tests okay, go to Step
4.
3. If the Right/Increase push button is not pressed in time,
or if the push button is not working correctly, the follow-
ing displays appear:
ERROR R I GHT BUTTON
I S NOT WORK I NG
PLEASE CORRECT ERROR
BEFORE CONT I NU I NG
WI TH THE DI AGNOST IC
TEST PROGRAM
If the Right/Increase push button is not working correct-
ly, replace the push button.
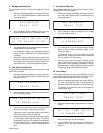
4. When the Right/Increase push button tests okay, the
diagnostics program tests the Left/Decrease push but-
ton. The display shows:
PLEASE PUSH
LEFT /DEC BUTTON
5. When this display appears, the control unit waits nine
seconds for the Left/Decrease push button to be
pressed. If this is done in time and the push button is
working correctly, the display shows:
LEFT /DEC BUTTON I S
WOR K I NG PROP ER L Y
If the Left/Decrease push button tests okay, go to Step
7.