


14
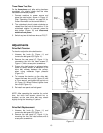
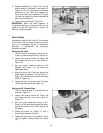
3. On the motor base plate, loosen the top hex
nut (A, Figure 13), and lift up on the motor to
create slack in the drive belt. Remove the
drive belt from both pulleys.
4. Install the new drive belt around top and
bottom pulleys, and tension it appropriately
(see “Drive Belt Tension”).
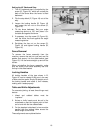
5. Re-install rear panel and belt guard (Figure
11).
Fence Movement
The fence can be moved forward or backward
across the width of the table. It also tilts up to 45
degrees forward and backward, and contains
positive stops at both these angles, as well as a
positive stop at 90 degrees.
To slide fence forward or backward:
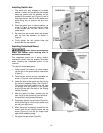
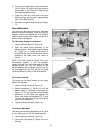
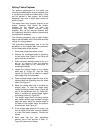
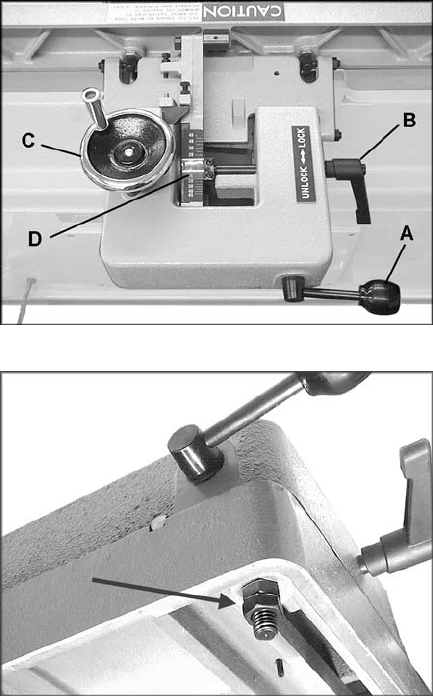
1. Loosen locking handle (A, Figure 14).
2. Push the entire fence assembly to the
desired position, and tighten locking handle
(A, Figure 14). A plastic buffer piece is
mounted to the front of the fence to prevent
scratching the table when the fence is
moved.
NOTE: If the lock handle (A, Figure 14) is in an
inconvenient position, it can be adjusted.
Loosen the two hex nuts underneath the slide
bracket (Figure 15). Flip the handle to the
desired position, and re-tighten the hex nuts. Do
not over-tighten the hex nuts, as this can make
the fence difficult to move on the slide bracket.
To tilt fence forward:
The fence can be tilted forward to any angle
down to 45 degrees.
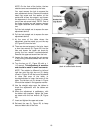
1. Loosen locking handle (B, Figure 14).
2. Rotate handwheel (C, Figure 14) until the
desired angle is indicated on the scale (D,
Figure 14). Or you can place your beveled
workpiece on the table and against the
fence, and rotate the handwheel (C, Figure
14) until the angle of the fence matches the
bevel of your workpiece.
3. Tighten locking handle (B, Figure 14).
To tilt fence backward:
The fence can be tilted backward up to 45° (that
is, for a total angle of 135° from table surface).
1. Loosen locking handle (B, Figure 16).
2. Flip the 90° stop block (E, Figure 16) out of
the way.
Figure 14
Figure 15