


19
Setting Knives at Correct Height and
Parallel To Outfeed Table
For accurate jointing, the outfeed table surface
must be level with the knives (or knife inserts for
the helical cutterhead) at the high point of their
arc. In addition, on the straight cutterhead, the
knives must be parallel with the outfeed table
along the entire length of the knives.
When you receive the jointer, the knives have
been pre-set at the factory. However, the height
and parallelism of the knives with the outfeed
table should be checked, and any needed
adjustments made, before operating the jointer.
Height setting of knives is not applicable to the
helical head models, in which the knife inserts
are immediately at the proper height after
installing. However, the height of the outfeed
table must still be verified in relation to the arc of
the knife inserts, as follows.
Knives or knife inserts are
extremely sharp; use caution and proceed
slowly when setting them.
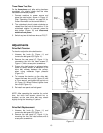
To set outfeed table in relation to the knives,
proceed as follows:
1. Disconnect jointer from power source.
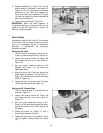
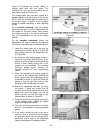
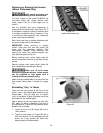
2. Raise the outfeed table by loosening the
locking handle (A, Figure 23) and using the
lever (B).
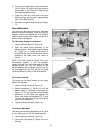
3. Place a straight edge upon the outfeed table
and extending over the center of the
cutterhead as shown in Figures 23 and 24.
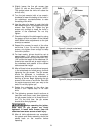
4. Rotate the cutterhead, using the belt or
pulley, until one knife or knife insert is at its
highest point. Do not grab the cutterhead
itself to rotate it.
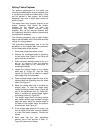
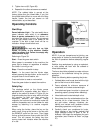
5. Lower the outfeed table until the straight
edge contacts the knife, as shown in Figure
24. Using the drive belt, rock the cutterhead
slightly to make sure the apex of the knife is
contacting the straight edge.
6. Lock the outfeed table at that height by
tightening the locking handle (A, Figure 23).
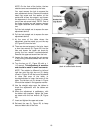
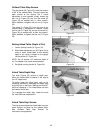
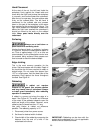
The importance of the knives being level with
the outfeed table are shown by these examples
of incorrect settings:
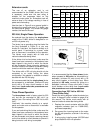
If the outfeed table is too high, the finished
surface of the workpiece will be curved. See
Figure 25.
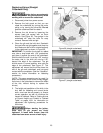
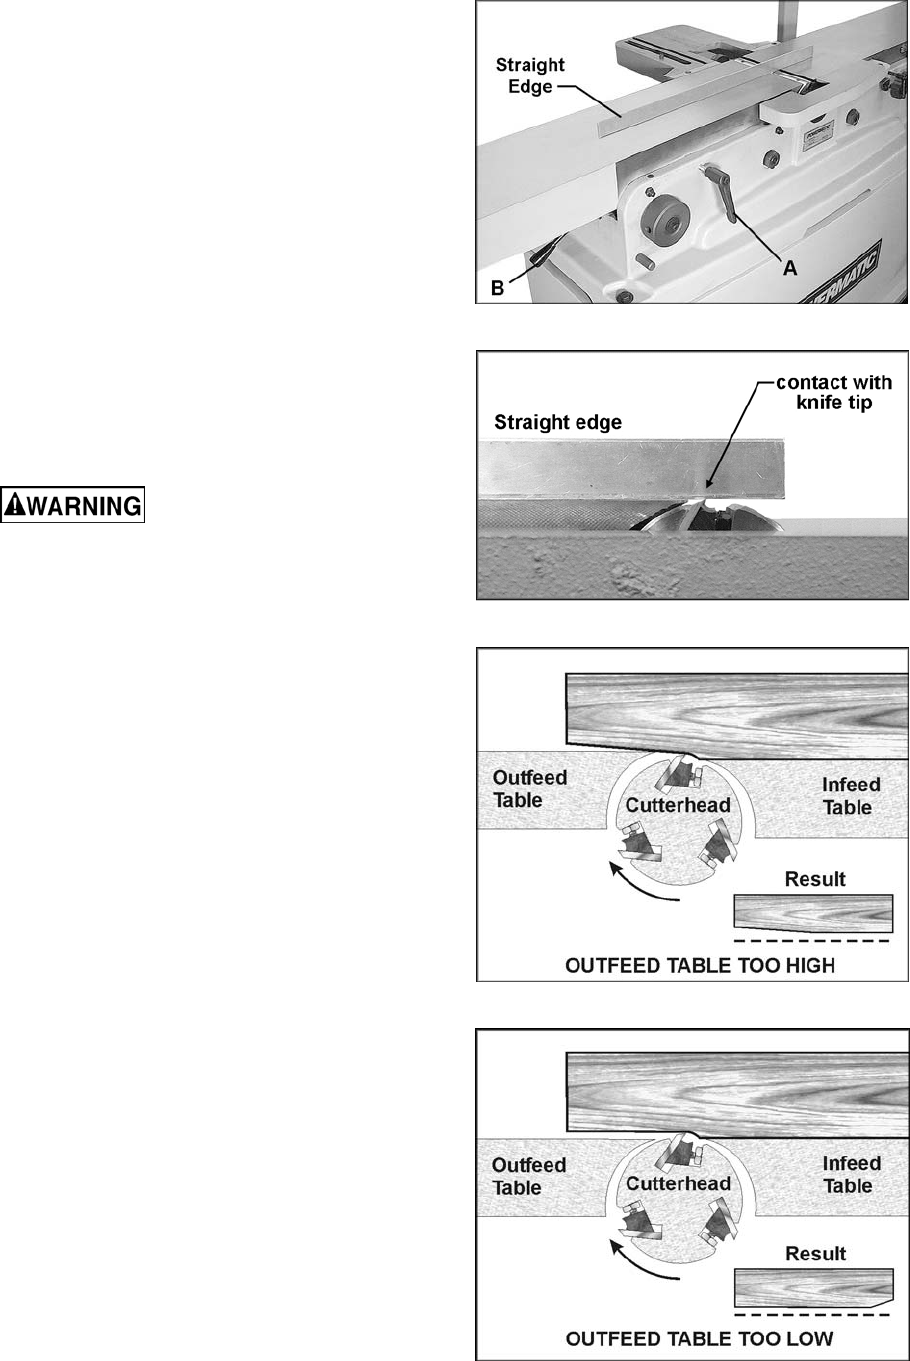
If the outfeed table is too low, the work will have
a gouge, or snipe, at the end of the cut. See
Figure 26.
Figure 23
Figure 24
Figure 25
Figure 26