


9
Installation and Assembly
Tools required for assembly
Forklift or hoist with straps/slings
14mm (or 9/16”) wrench or socket
Cross-point (Phillips) screwdriver
3mm and 5mm hex wrenches (provided)
1. Remove any boards or straps that secure
the Jointer to the pallet, and remove
protective wrapping.
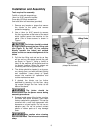
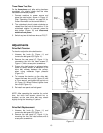
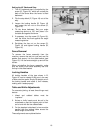
2. Use a 14mm (or 9/16”) wrench to remove
the four lag screws at the base of the stand
which helped secure the machine to the
pallet. One of these screws is shown in
Figure 1.
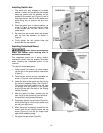
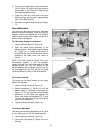
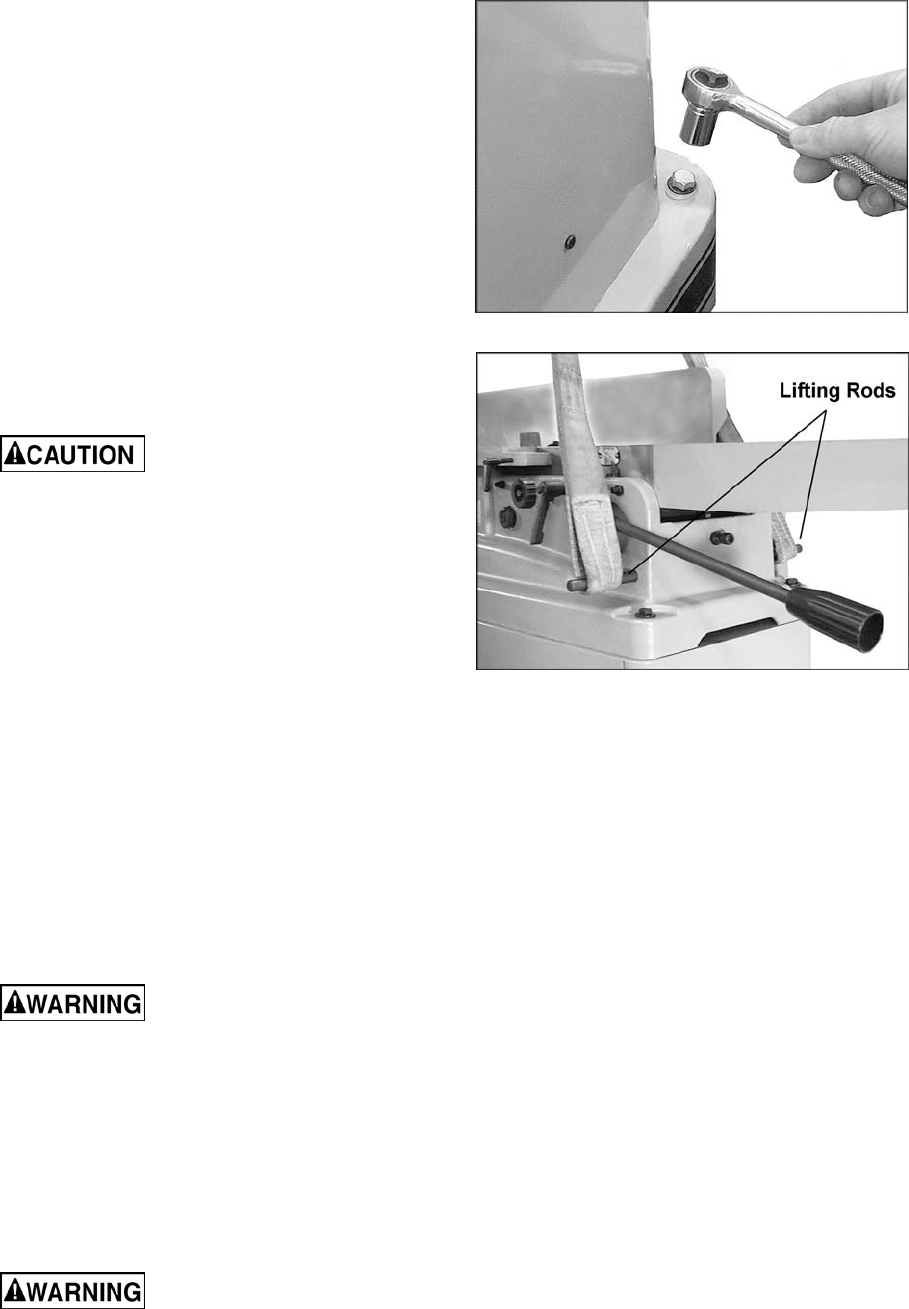
The Jointer should be raised
by straps placed around the four lifting rods
(see Figure 2). Do NOT lift the machine
directly beneath the infeed and outfeed
tables, as this can cause misalignment of the
tables.
3. Pull the four lifting rods out as far as they
will go and run the straps around the rods
as shown in Figure 2. Using a forklift or
hoist, lift the machine off the pallet and into
its desired location. When the straps are
removed, push the lifting rods back in.
4. The Jointer should be located in a dry area,
on a sturdy floor, and with sufficient lighting
and ventilation. Leave plenty of space
around the machine for operations and
routine maintenance work.
5. If desired, the Jointer can be further
stabilized by securing it to the floor, using
lag screws through the four holes at the
base of the stand.
The jointer should be
disconnected from the power source during
assembly procedures.
6. Exposed metal areas of the Jointer, such as
the table and fence surfaces, have been
factory coated with a protectant. This can be
removed with a soft cloth dampened with
kerosene or mineral spirits. Do not use an
abrasive pad. Do not let solvent contact
plastic or rubber parts as it may damage
them.
Use caution when cleaning
around cutterhead. The knives are extremely
sharp.
Figure 1
Figure 2
(straps not included)