


36
ADJUSTMENTS
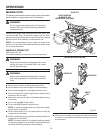
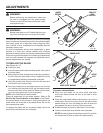
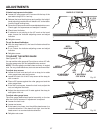
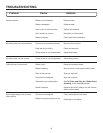
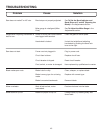
TO SET THE BEVEL INDICATOR AND BEVEL
STOPS AT 0˚ AND 45˚
See Figures 48 - 51.
The angle settings of the saw have been set at the factory
and, unless damaged in shipping, should not require set-
ting during assembly. After extensive use, it may need to
be checked.
To check for squareness, 0˚ position:
Unplug the saw and remove the switch key.
Raise the blade to a 3 in. depth of cut.
Release the bevel locking lever.
Push the height/bevel adjusting handwheel to the left as
far as possible.
Lock the bevel locking lever.
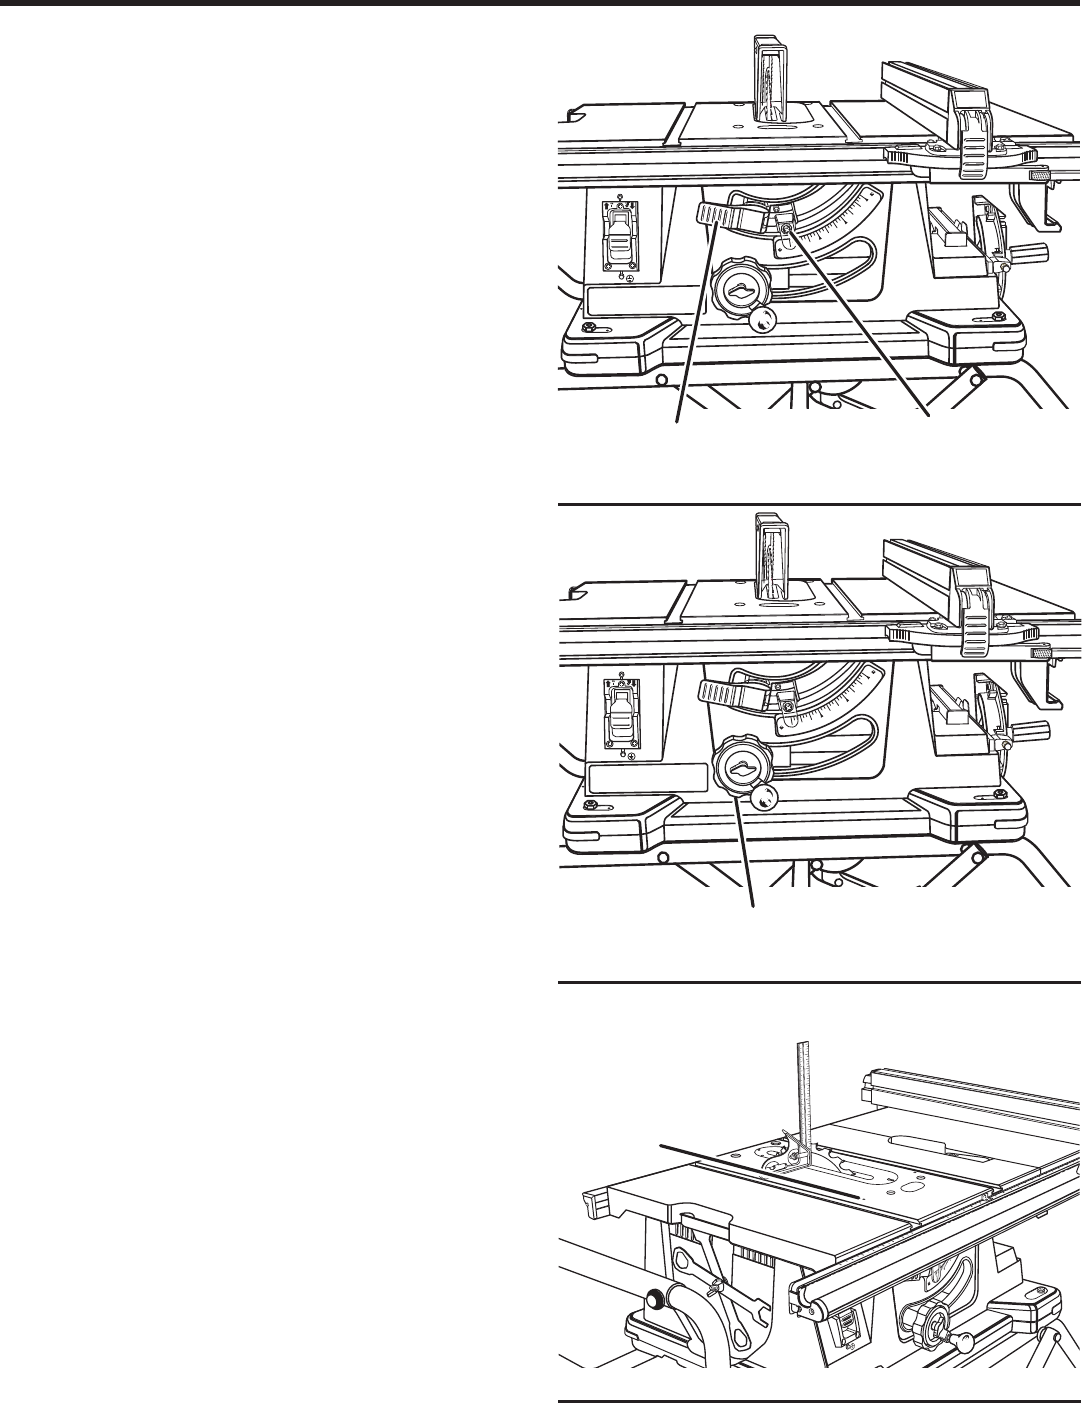
Place the combination square against blade. Make sure
square is not touching the tip of one of the saw teeth.
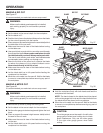
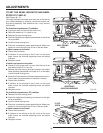
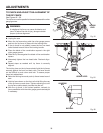
If blade is square to the table:
Check bevel indicator.
If indicator is not pointing to the 0º mark on the bevel
scale, loosen the indicator adjusting screw and adjust
indicator.
Retighten screw.
If blade is not square to the table:
Loosen 0º stop screw until it is even with the top of the
saw table using 5/32 in. hex key.
Release the bevel locking lever and position the height/
bevel adjusting handwheel until blade is 0º to the table.
Lock the bevel locking lever.
Screw the 0º stop screw until the saw blade starts to move.
Check again for squareness and readjust if needed.
Check bevel indicator.
If indicator is not pointing to the 0º mark on the bevel
scale, loosen the indicator adjusting screw and adjust
indicator.
Retighten screw.
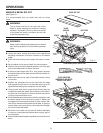
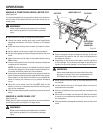
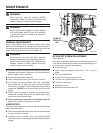
To check for squareness, 45˚ position:
Release the bevel locking lever.
Push the height/bevel adjusting handwheel to the right
as far as possible.
Lock the bevel locking lever.
Place the combination square against blade. Make sure
square is not touching the tip of one of the saw teeth.
If blade is square to the table:
Check bevel indicator.
If indicator is not pointing to the 45º mark on the bevel
scale, loosen the indicator adjusting screw and adjust
indicator.
Retighten screws.
Fig. 48
Fig. 49
Fig. 50
BLADE AT 0˚ POSITION
BEVEL LOCKING
LEVER
0˚ STOP
SCREW
HEIGHT/BEVEL
ADJUSTING HANDWHEEL
INDICATOR
ADJUSTING SCREW
0
15
30
45
ON
OFF
0
15
30
45
ON
OFF
15
0
30
0
0
3
3
2
2
4
4
5
6
7
8
9
15
14
13
12
11
10
9
1
1
8
10
11
12
13
14