37
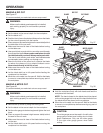
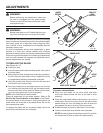
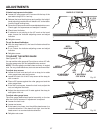
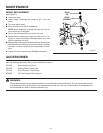
Fig. 51
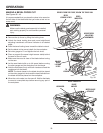
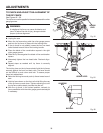
Fig. 52
LOCK
NUT
BLADE AT 45˚ POSITION
0° ADJUSTABLE
STOP SCREW
MITER
GAUGE ROD
ADJUSTMENTS
If blade is not square to the table:
Loosen 45º stop screw until it is even with the top of the
saw table using 5/32 in. hex key.
Release the bevel locking lever and position the height/
bevel adjusting handwheel until blade is 45º to the table.
Lock the bevel locking lever.
Screw the 45ºstop screw until the saw blade starts to move.
Check again for squareness and readjust if needed.
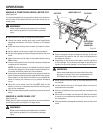
Check bevel indicator.
If indicator is not pointing to the 45º mark on the bevel
scale, loosen the indicator adjusting screw and adjust
indicator.
Retighten screw.
To set the bevel indicator:
With the saw blade at 0º, the bevel indicator should be
pointing to 0º.
If not, loosen the indicator adjusting screw and adjust
indicator.
Retighten screw.
TO ADJUST THE MITER GAUGE
See Figures 52 - 53.
You can set the miter gauge at 0º and plus or minus 45º with
the miter gauge stop pin and adjustable stop screws.
NOTE: The miter gauge provides close accuracy in angled
cuts. For very close tolerances, test cuts are recommended.
To adjust stop screws:
Loosen the lock knob and pull out on stop pin to rotate
miter gauge base past stop screws.
Loosen the lock nut of the 0º stop screw at the stop pin
with a wrench.
Place a 90º square against the miter gauge rod and the
miter gauge base.
If the rod is not square, loosen the lock knob, adjust the
rod, and retighten the knob.
Adjust the stop screw until it rests against the stop pin
and tighten lock nut.
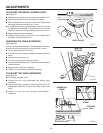
To adjust miter gauge base:
The miter gauge base should swivel smoothly on the bar
after the knob is loosened. If adjustment is required:
Loosen the lock knob.
Loosen set screw.
If the base is too loose, turn the phillips head screw in a
clockwise direction. If the base is too tight, turn the flat
head screw in a counterclockwise direction.
Retighten set screw.
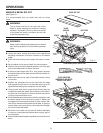
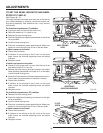
Fig. 53
SET SCREW
MITER
GAUGE BASE
45° ADJUSTABLE
STOP SCREW
STOP PIN
LOCK
KNOB
FLAT HEAD
SCREW
45˚ STOP
SCREW


