


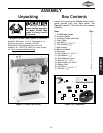


ASSEMBLY
-18-
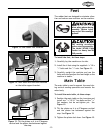
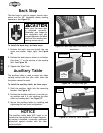
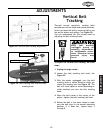
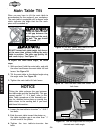
Figure 25. Back stop use in horizontal sanding
operations.
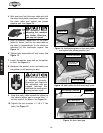
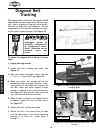
Figure 26. The back stop gap.
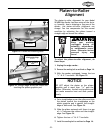
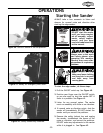
Figure 27. Auxiliary table installed.
Back Stop
The back stop is used to support shorter work-
pieces and for 90˚ horizontal platen sanding
operations. See Figure 25.
To install the back stop, do these steps:
1. Position the back stop and install the cap
screw and washer finger tight. See Figure
26.
2. Position the back stop no closer or no farther
than than
1
⁄8" to the surface of the sanding
belt. See Figure 26.
3. Tighten the Allen
®
bolt.
Make sure the back stop
is adjusted correctly.
Otherwise, your fingers or
the workpiece may get
trapped between the back
stop and the sanding belt
causing serious injury.
Auxiliary Table
The auxiliary table is used to assist you when
sanding curves with the idler roller when the
the platen cannot be used.
To install the auxiliary table, do these steps:
1. Slide the auxiliary table into the mounting
bracket. See Figure 27.
2. Position the auxiliary table so it is at the cen-
ter position and it is not touching the idler
roller and sanding belt. See Figure 27.
3. Secure the auxiliary table by installing and
tightening the lock knob into position.
NOTICE
The auxiliary table does NOT need to be
installed on the sander at all times. However,
by leaving it installed, it provides additional
protection against contact with the idler
roller and belt.
Cap Screw and
Flat Washer
Back Stop
Auxiliary
Table
Lock
Knob
Back Stop
to
Belt Gap
is
1
⁄8"