


10 INCRA Woodworking Tools & Precision Rules
3
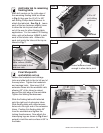
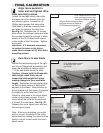
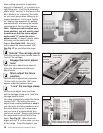
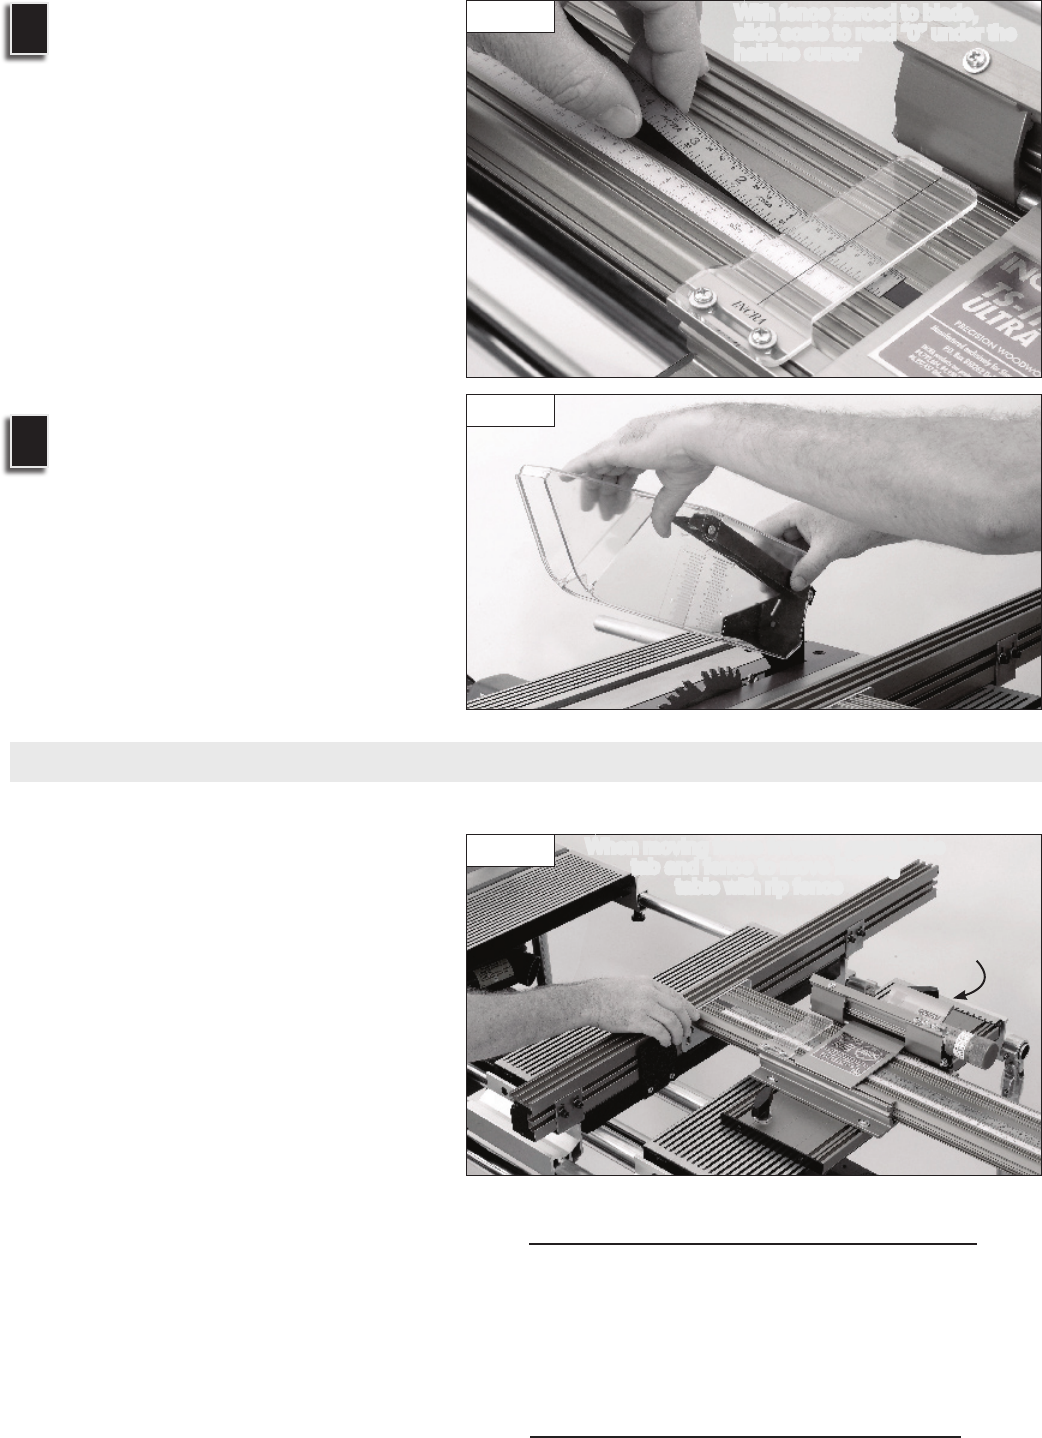
Set scale position
With the Ultra base still locked with the
rip fence at the “zeroed” position set in
step 2, lift one end of the stainless steel
scale from the magnetic track and slide
the scale to position 0” under the hairline
cursor. See Fig. 21. Lower the scale
back onto the magnetic track. If you
want, you can also slide the two-piece
lexan scale to agree with the stainless
steel scale. Make sure the overlapping
ends of the scales are aligned at 16”.
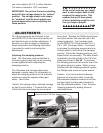
4
Reinstall your Shopsmith
blade guard
Before operating your new INCRA TS-
III Ultra, replace the Shopsmith blade
guard removed earlier, Fig. 22.
Moving the rip fence to a new scale
setting
Moving the rip fence to any new position
is simple. First, push the carriage clamp
down to “unlock”, then slide the fence to
the new position. See Fig. 23. Always
align the mark on the scale directly
under the hairline cursor before locking
the carriage clamp in place. To secure
the rip fence at the new scale location,
simply pull the carriage clamp up into
the “locked” position. When moving the
rip fence, take care not to accidentally
slide the scale in its slot.
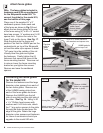
When moving the rip fence in the area
between the worktable and the Ultra
base it is important to provide support
for the rip fence glides. This is done
by moving the floating table with the
rip fence. The table tab added to the
floating table earlier makes this dual
Figure 21
Figure 22
Figure 23
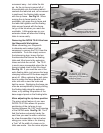
OPERATION
With fence zeroed to blade,
slide scale to read “0” under the
hairline cursor
When moving fence forward, grasp table
tab and fence to move floating
table with rip fence
Lower carriage
clamp to unlock
carriage
TIP
▼▼▼▼▼▼▼▼▼▼▼▼▼
To keep your rip fence glides and
floating table moving smoothly, clean
and apply paste wax to the rails and
extension tubes from time to time.
▲▲▲▲▲▲▲▲▲▲▲▲▲TIP