


INCRA TS-III ULTRA Shopsmith Owner’s Manual 5
3
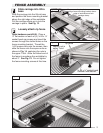
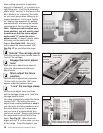
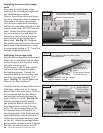
Add table tab to remaining
floating table
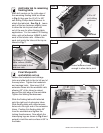
Mark drill centers on the right edge of
the remaining floating table as shown
in Fig. 5, then use the (2) #10 x 5/8”
self drilling Phillips head fasteners to
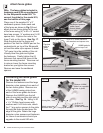
attach the table tab. See Fig. 6. Leave
each of the two fasteners slightly loose
to allow the tab to pivot down and
out of the way for other floating table
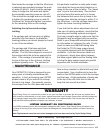
applications. For the model 510 floating
table, add self adhesive UHMW to both
ends of the tubular rails. Adhere the
pads just inside the tubes at the top as
shown in Fig. 7.
Figure 5
Figure 6
Figure 7
Figure 8
4
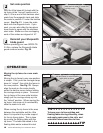
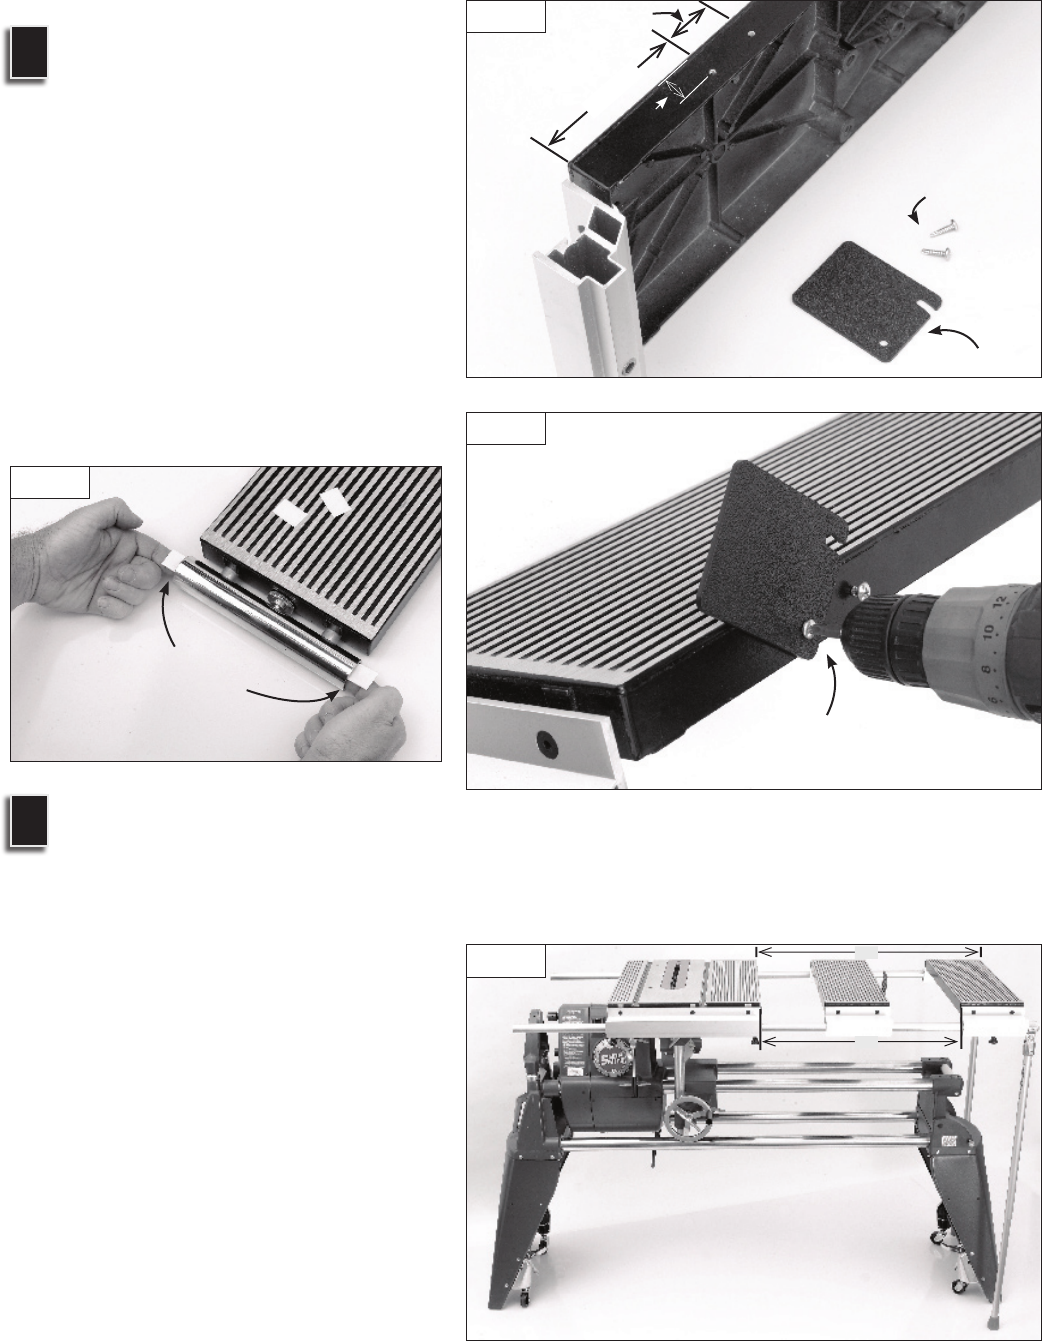
Final Shopsmith
workstation set up
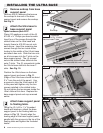
Loosen the headstock and carriage
locks and slide both to the far left end of
the way tubes. Tighten the headstock
and carriage locks. Now insert (2) 5ʼ
extension tubes into the worktable rails
allowing 32” of the tubes to extend
beyond the right edge of the worktable.
Tighten the locking thumbscrews.
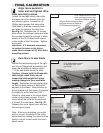
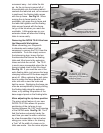
Slide the floating table with table tab
onto the right end of extension tubes.
Slide floating table with drilled access
holes onto the right end of the extension
tubes. Position this floating table 23”
from the worktable and tighten the
locking thumbscrews. Now attach the
telescoping legs as shown in Fig. 8 and
extend to hold the work surface at 90° to
the blade.
Leave fasteners loose
enough to allow tab to pivot
For Model 510 floating
table, adhere UHMW
pads as shown to front
and rear rails
table tab
#10 x
5
/
8
”
self-drilling
fasteners
13
/1
6
”
4
9
/
16
”
1 ¾”
32”
23”