


4 INCRA Woodworking Tools & Precision Rules
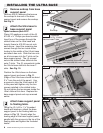
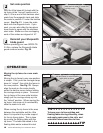
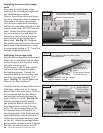
To enjoy the full working range of the
INCRA TS-III Ultra , you will want to
configure your Shopsmith workstation
at shown in Fig. 1. This configuration
requires, (2) 5ʼ Connector Tubes, (2)
Telescoping Legs, and (2) Floating
Tables. The instructions below detail
the modifications needed for the floating
tables and the final set up. Begin by
unplugging the Shopsmith, then remove
the blade guard.
Note: The blade guard must be
reinstalled after you have finished
mounting the INCRA TS-III Ultra to
your Shopsmith workstation.
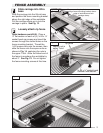
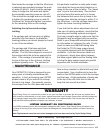
1
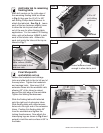
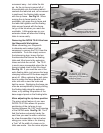
Drill access holes in one
floating table
Turn one of your Shopsmith floating
tables upside down at the drill press
and, using a 3/8” twist drill bit, drill
through the table at the two locations
shown in Fig. 2. Try to center the holes
on the existing hole recesses in the
casting.
CAUTION: When drilling metal,
always operate your drill press at
“Slow” speed and securely clamp the
floating table to your drill press table.
DO NOT ATTEMPT TO DRILL THE
FLOATING TABLE FREEHAND.
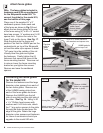
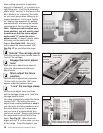
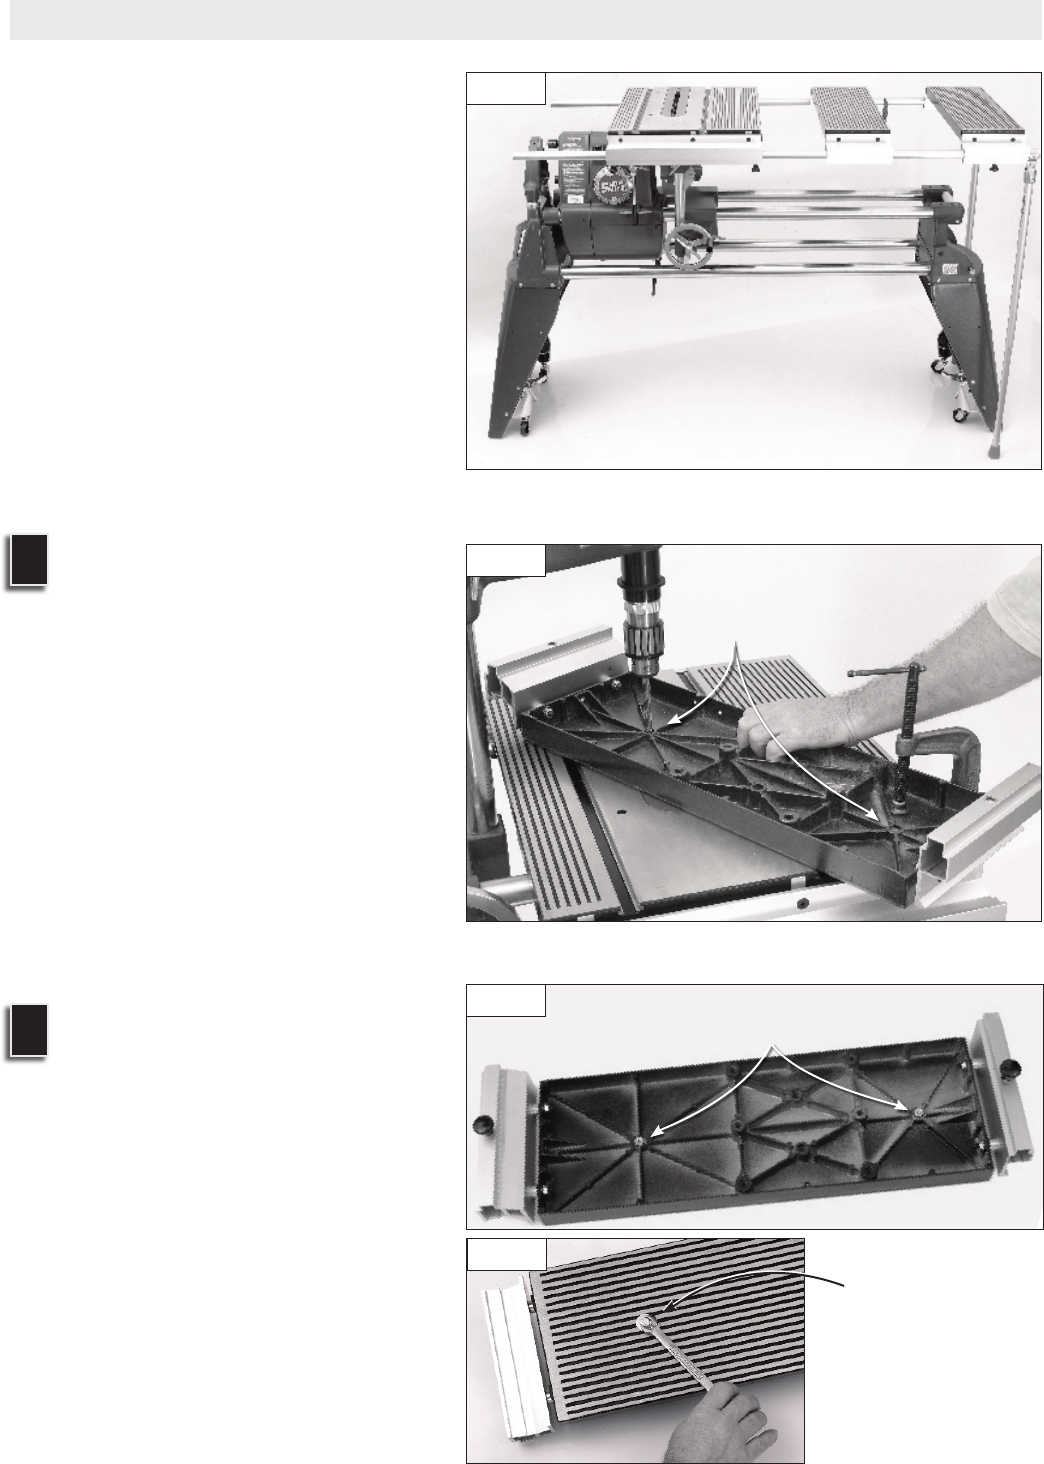
2
Pull hex nuts into hole
recesses
Open hardware pack B-06. Gently
press a ¼-20 hex nut into each of
the two hole recesses drilled above.
See Fig 3. Place a washer on the ¼-20
hex bolt provided and thread the bolt
into the hex nut from the top of the table.
Now use a 7/16” wrench to pull the hex
nuts firmly into the hole recesses. See
Fig. 4. Tighten the bolt until the nut
bottoms out in the hole. Remove and
discard the hex bolt and washer.
PREPARING YOUR SHOPSMITH WORKSTATION
Figure 1
Figure 3
Figure 4
Pull hex nut into
hole recess using
¼-20 hex bolt
with washer as
shown
Gently press ¼-20 hex nut into
each of two hole recesses
Figure 2
Drill 3/8” diameter holes
through table at these
two locations