INCRA TS-III ULTRA Shopsmith Owner’s Manual 3
SYSTEM DESCRIPTION
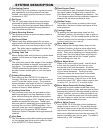
Positioning Control
The INCRA TS-III Ultra obtains its great accuracy
and repeatability from the precision cast saw-
toothed racks which position the fence in exact
increments of 1/32”.
Rip Fence
The 36” long heavy-duty rip fence is precision
machined for perfect flatness along its length.
T-slots along the front face permit easy addition of
user made wooden subfences using standard
¼-20 hex bolts and hex nuts.
Fence Mounting Bracket
This bracket provides a quick and easy means to
attach the rip fence.
Rip Fence Glides
These heavy duty glides support the rip fence
slightly above the worktable surface providing an
effortless motion from one fence position to the
next. The glides can be configured for either the
Shopsmith model 510 or 520 rails.
Floating Table Tab
Moves floating table with rip fence to provide extra
support for the fence and large work pieces.
Carriage
The reinforced square tube design of the carriage
provides the ultimate in strength and support for
your fence. The carriage rides on self-lubricating
UHMW guide bearing surfaces in the base to
provide a velvet smooth glide to your next fence
setting.
Primary Sliding Scale
After setting up your INCRA TS-III Ultra and
“zeroing” the fence to the blade, slide this scale to
read 0” under the hairline cursor. The precision
etched stainless steel scale is held on a magnetic
track. Use this scale as the primary source for
readout of fence to blade distance.
Auxiliary Scale Slots
Four auxiliary scale slots are provided to allow
additional setups and cutting operations to take
place without altering the primary scale position.
Simply slide the supplied 1/32” “floating” scale into
position as needed for reference. These extra
slots are great for advanced joinery applications
requiring the use of the INCRA templates. You
can even leave your most frequently used joinery
templates from the optional INCRA Master
Reference Guide & Template Library permanently
installed.
Ultra Base
The Ultra base provides both tracking and support
for the carriage and is the control center for most
of the INCRA TS-III Ultraʼs features.
Base Support Panel
Once attached to your Shopsmith floating table,
this panel makes it easy to add or remove the
Ultra Base from your Shopsmith workstation. The
T-slot design makes the final calibration alignment
between the rip fence and blade a snap.
Hairline Cursor
The large hairline cursor provides a clear visual
reference of the fence location and spans all five
scale positions.
Carriage Clamp
By pushing the carriage clamp down into the
“unlocked” position, the carriage is free to glide to
the next setting. Pull the clamp handle up into the
“locked” position and the carriage is locked solidly
in place, ready for your next cut.
Micro Adjust Lever
After pushing the carriage clamp down into the
“unlocked” position, push the micro adjust lever
down to place the Ultra Base into the “micro adjust
mode”. After micro adjusting your fence position,
simply reset the micro adjust lever and then pull
the carriage clamp up into the “locked” position
before making your next cut.
Micro Adjust Knob
When in the “micro adjust mode”, use this knob
to fine-tune the position of the fence in one
thousandth of an inch increments. A hairline
cursor and easy-to-read scale give a clear readout
of your fence movement. Turning the knob
clockwise moves the fence closer to the blade.
Turn it counterclockwise and the fence moves
away from the cutter. Each full turn of the knob
moves the fence 1/32”. Micro adjust range is plus
or minus 1/4”, for a full 1/2” of vernier travel.
Micro Adjust Scale with Zeroing Feature
Large easy-to-read numbers make fine-tuning
your fence position a snap, and once youʼve micro
adjusted and pulled the carriage clamp up into the
“locked” position, you can re-zero the scale if you
desire. Just rotate the scale (not the knob) gently
with your fingers to return the zero on the scale to
its original position under the cursor.
Micro Adjust Cursor
Your INCRA TS-III Ultra has a micro adjustment
range of plus or minus 1/4”. By sighting through
the micro adjust cursor to the left end of the micro
adjust knob, this feature tells you how far you
have micro adjusted away from the mid-range (0”)
position and which way youʼve gone. The scale is
marked off in 1/32” increments.
1
2
3
4
5
6
7
8
9
12
11
10
14
13
16
15


