


INCRA TS-III ULTRA Shopsmith Owner’s Manual 7
1
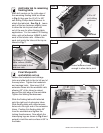
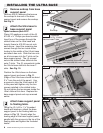
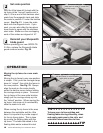
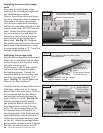
Slide carriage into Ultra
base
Slide the carriage into the Ultraʼs base
and position the fence mounting bracket
above the right edge of the worktable.
Pull the carriage clamp up to lock the
carriage in place. See Fig. 13.
2
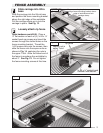
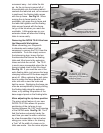
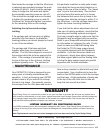
Loosely attach rip fence
Open hardware pack B-08. Place a
¼” flat washer on each of (2) ¼-20 x ½”
socket head cap screws and insert the
screws through the slotted holes on the
fence mounting bracket. Thread the
¼-20 square nuts onto the screws, then
slide the fence onto the square nuts as
shown in Fig. 14, capturing the nuts in
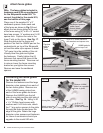
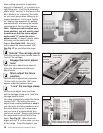
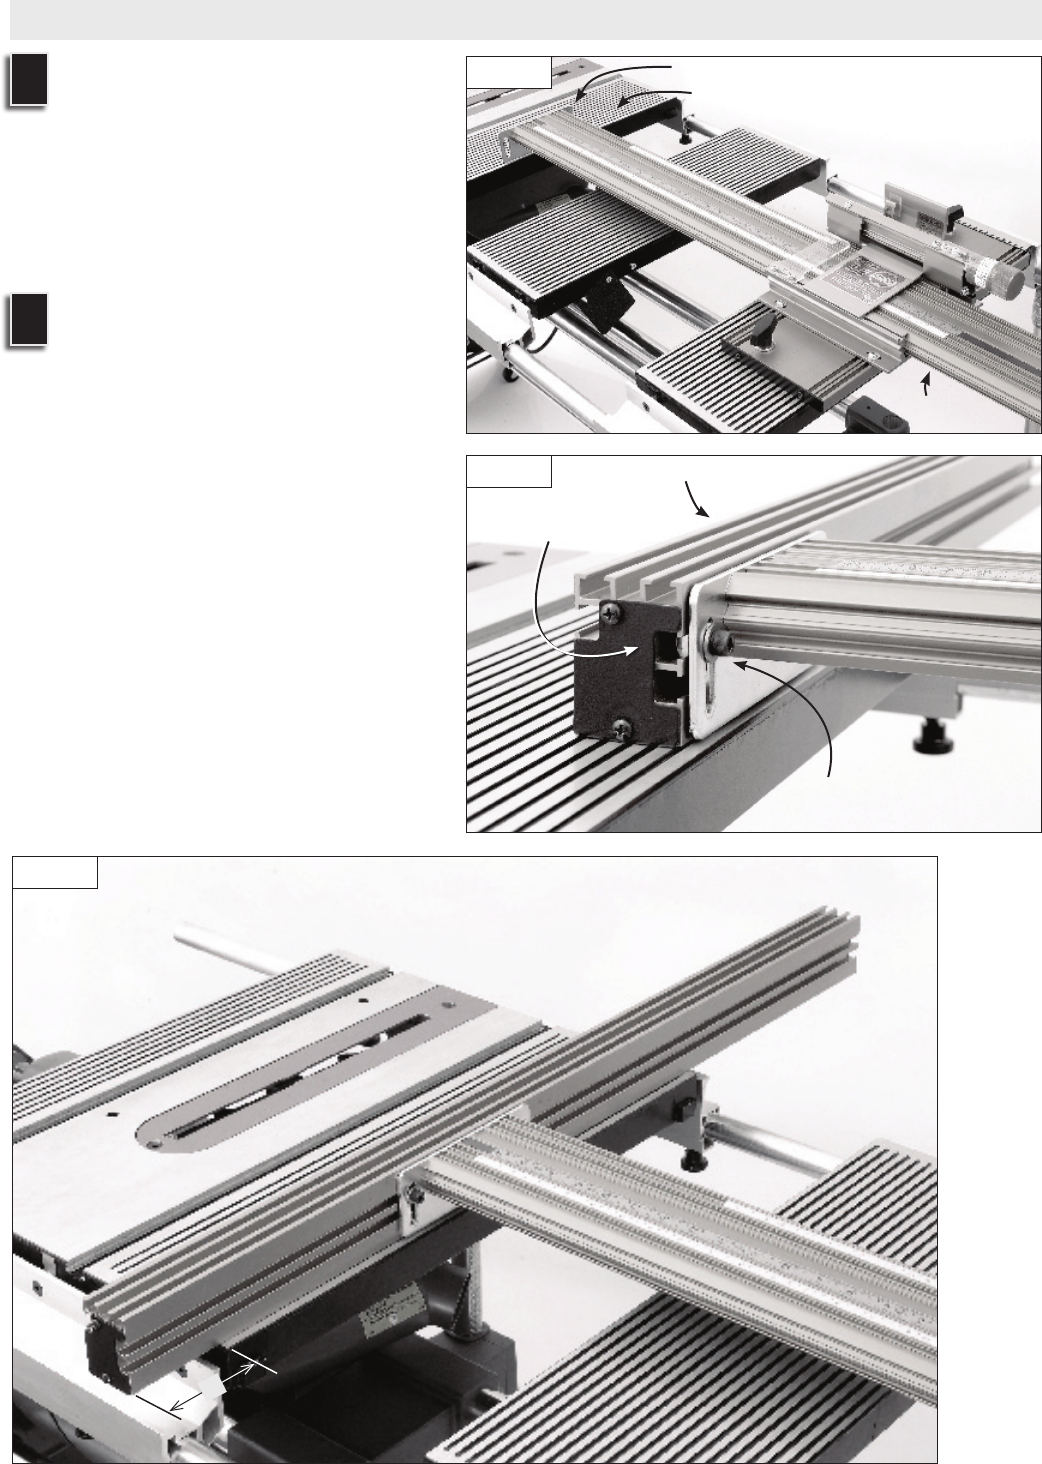
the upper T-slot. Allow the infeed end of
the fence to overhang the worktable by
about 3”. See Fig. 15. Do not tighten
the fence mounting screws at this time.
FENCE ASSEMBLY
Figure 13
Figure 14
Figure 15
Fence mounting bracket
Align fence mounting bracket above
edge of worktable and lock
carriage clamp
carriage
rip fence
capture nut in
upper T-slot
¼-20 x ½” socket head
fastener with washer
3”