


For Machines Mfg. Since 8/09 Model SB1029
-29-
OPERATION
Wheel Balancing
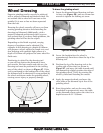
Static wheel balancing can be difficult and very
time consuming without practice. For accurate
grinding results, wheel balancing is mandatory.
For this balancing procedure, you will need a
wheel balancing fixture. The wheel balancing
fixture shown in Figure 39 is one example of the
many varieties available on the market.
Before proceeding, the grinding wheel must be
ring tested (refer to Page 23) and dressed (refer
to Page 28).
If flood coolant was used with the grinding
wheel, run the machine with the grinding wheel
installed for 5-minutes to sling off any residual
coolant that may have settled to the low side of
the wheel. If the paper washers are missing, wet,
or damaged, replace them before proceeding. If,
during a period of machine operation, you find
that a finish is becoming poor, redress the wheel.
If that does not correct the problem, rebalance
your grinding wheel.
To balance the grinding wheel:
1. DISCONNECT MACHINE FROM POWER!
2. Set up the wheel balancer as outlined in its
product user manual.
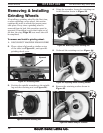
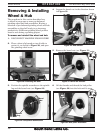
3. Remove the grinding wheel and hub as
a unit from the spindle as outlined in
Removing & Installing Grinding Wheel
Hub on Page 26.
Figure 39. Wheel on balancing fixture.
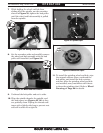
4. Without letting any of the balance dogs or
lock balls fall out of the hub, use a 2.5mm
hex wrench to loosen the dogs and position
them at the 0°, 120°, and 240° degree
locations indicated by the degree scale on the
hub (see Figure 40).
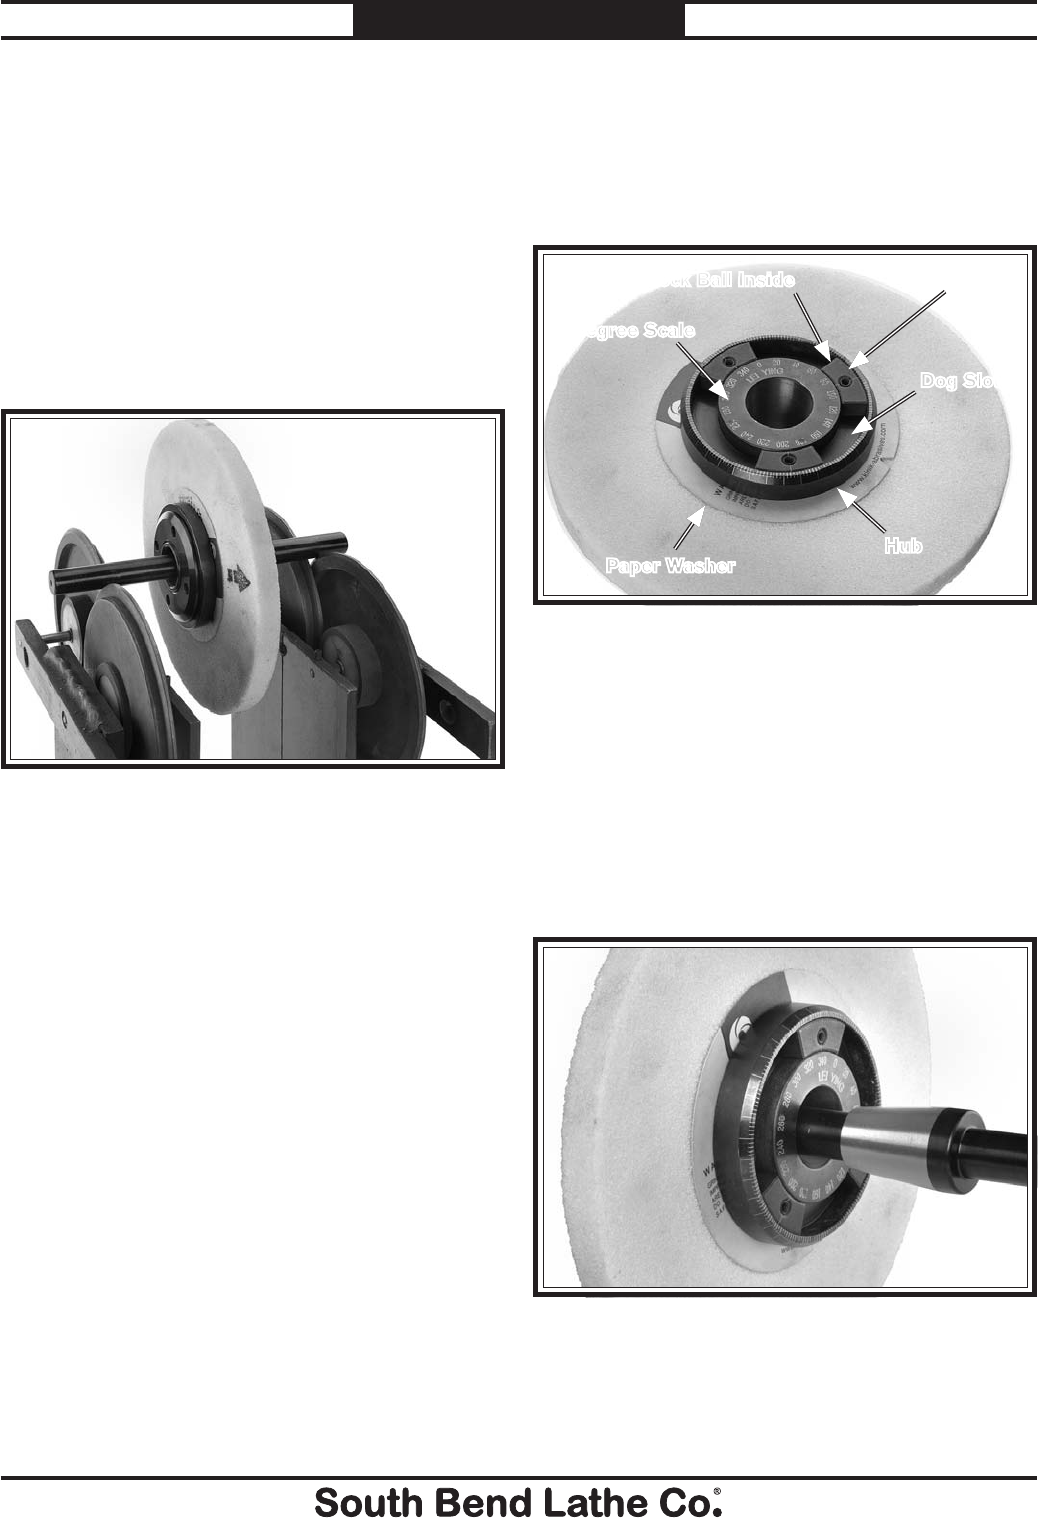
Figure 40. Grinding wheel hub.
Degree Scale
Lock Ball Inside
Balance Dog
Dog Slot
Hub
Paper Washer
Note: Pay special attention to keep the dogs
engaged in the hub slot when they are loose.
If you lose any of the lock balls, it will be
impossible to continue this procedure until
they are replaced.
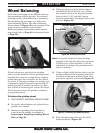
5. Using a slightly-oiled lint free cloth, wipe the
mating surfaces of the balancing arbor and
the internal hub taper perfectly clean, then
push them together, as shown in Figure 41.
Figure 41. Installing the balancing arbor.
6. Place the balancing arbor onto the wheel
balancing fixture (Figure 39).