


-40- G0504 16" Horizontal Resaw Bandsaw
3. Disconnect the resaw from the power
source!
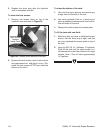
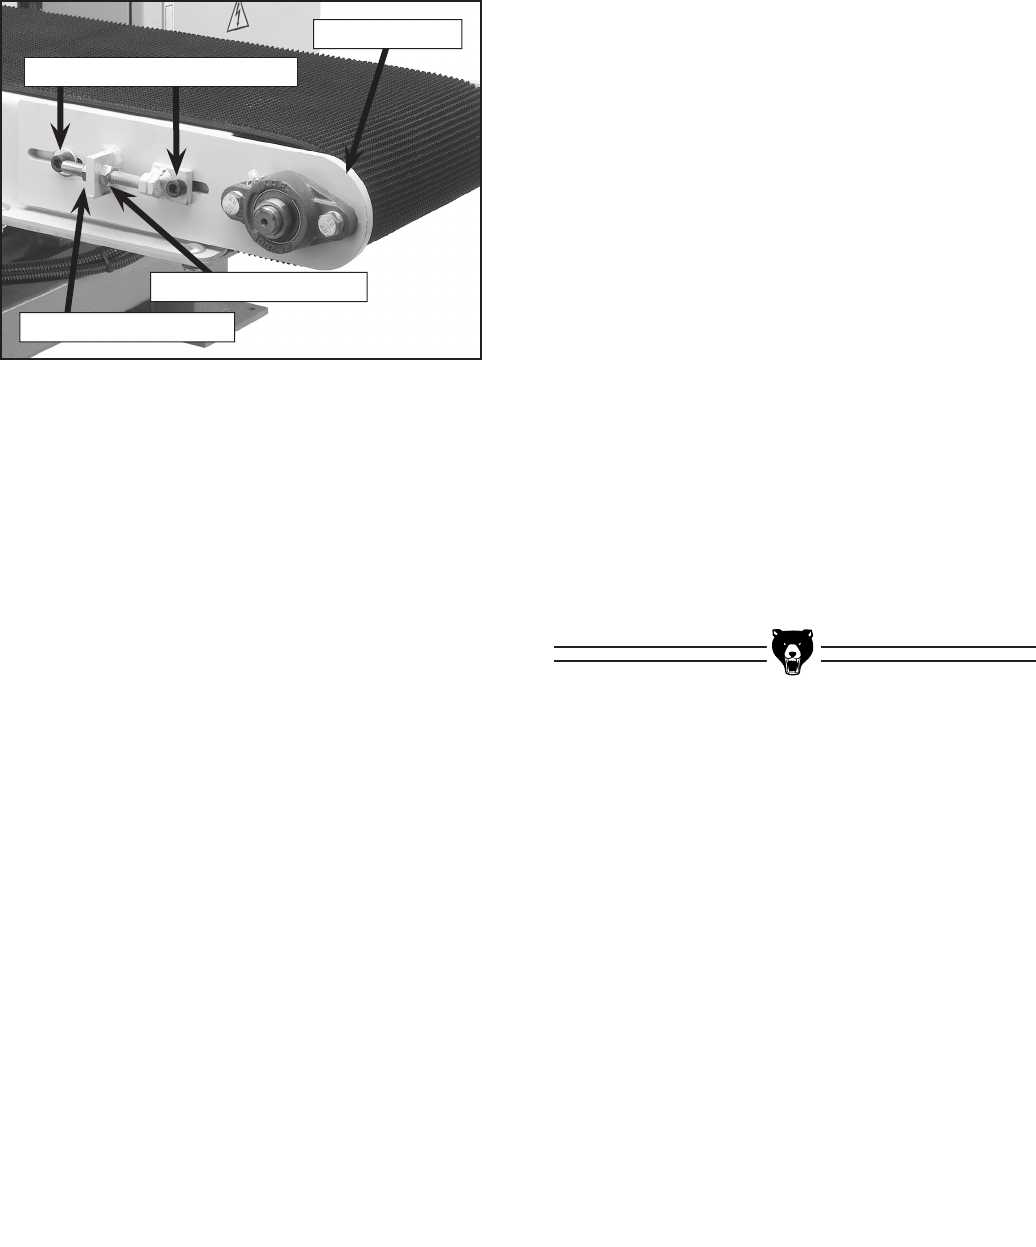
4. Loosen the roller bracket (see Figure 42) by
turning the roller bracket cap screws
3
⁄4 of a
turn.
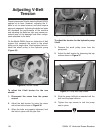
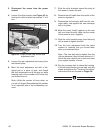
Figure 42. Roller bracket cap screws and
adjustment nuts.
Roller Bracket Cap Screws
Rear Adjustment Nut
Front Adjustment Nut
Roller Bracket
5. Loosen the rear adjustment nuts away from
the bracket plate.
6. Mark the front adjustment nut with a felt-
tipped pen or a piece of tape, and thread
the front adjustment nut all the way up, while
keeping track of the number of full turns that
you moved the nut.
Note—Write the number of turns down, so
you do not forget. Remembering this number
is an important part of the re-assembly pro
-
cess.
7. Slide the roller brackets toward the body of
the resaw to loosen the belt.
8. Remove the stiff cable from the center of the
seam to separate it.
9. Remove the old conveyor belt from the con-
veyor table, and replace the new conveyor
belt in its place.
10. Mesh the seam “teeth” together on the new
belt, and insert the stiff cable into the center
of the seam to lock it together.
11. Slide the roller brackets away from the body
of the resaw to tighten the belt.
12. Turn the front adjustment bolts the exact
number of rotations that you turned them
when you loosened them.
Note—The new belt may be tighter than the
old one because it has not been broken-in. If
this is the case, deduct one or two turns from
your original number of turns.
13. Run the conveyor belt to check the tracking.
If the belt starts tracking to one side, stop the
resaw and perform the “Tracking Conveyors”
instructions that are located on
Pages 38.