


CHAPTER 2
Setup and Configuration
8 StudioPix™ Pixelation Luminaire User Manual
Installing a Line Cord Cap - U.K. Only
In the United Kingdom, core colours in the mains lead of this equipment may not correspond
with the colored markings identifying the terminals in the fixture’s plug. In that case, install a
line cord cap according to the following code:
• Connect the green and yellow core to the plug terminal marked with the letter “E,” or by the
earth symbol
or coloured green, or green and yellow.
• Connect the blue core to the terminal marked with the letter “N” or coloured black.
• Connect the brown core to the terminal marked with the letter “L” or coloured red.
Vatic Fitter Heads Information - Danmark
Advarsel: Beskyttelse mod elektrisk chock.
Vigtigt!
Lederne med gul/groen isolation maa kun tilsluttes en klemme maerket
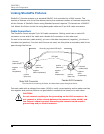
Mounting the Fixture
You can mount your StudioPix™ fixture suspended from a support system (such as a truss) or
freestanding on its base.
Note: Due to the wide variety of possible lighting designs, High End
Systems cannot make specific mounting recommendations. Consider
the following procedure as a suggested guideline only.
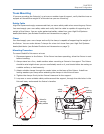
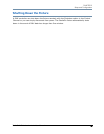
Mounting the Fixture Upright
To mount the fixture upright, place the fixture on a sturdy, stable non-flammable surface that
will support more than the
20.9 kg (46 lb) weight of the StudioPix™ fixture. If the surface is
above floor height, use safety cables to secure the fixture to the surface.
WARNING:
Class 1 equipment - This equipment must be earthed.
WARNING!
Equipment suitable for dry locations only. Do not expose this
equipment to rain or moisture.
CAUTION!
Always use a secondary safety cable when mounting this fixture.
This fixture must be installed and operated by trained personnel only.
Maintain a minimum focus distance of 1 meter from a lighted object.
CAUTION!
Do not mount the fixture upright without the four rubber feet attached.
eller
1 m