


CHAPTER 2
Setup and Configuration
12 StudioPix™ Pixelation Luminaire User Manual
Setting the DMX Start Channel
Each StudioPix fixture requires a block of consecutive channels on a 512-Channel DMX link. The
number of channels depends on the Protocol you are using.
To set the Start Channel on an StudioPix Fixture:
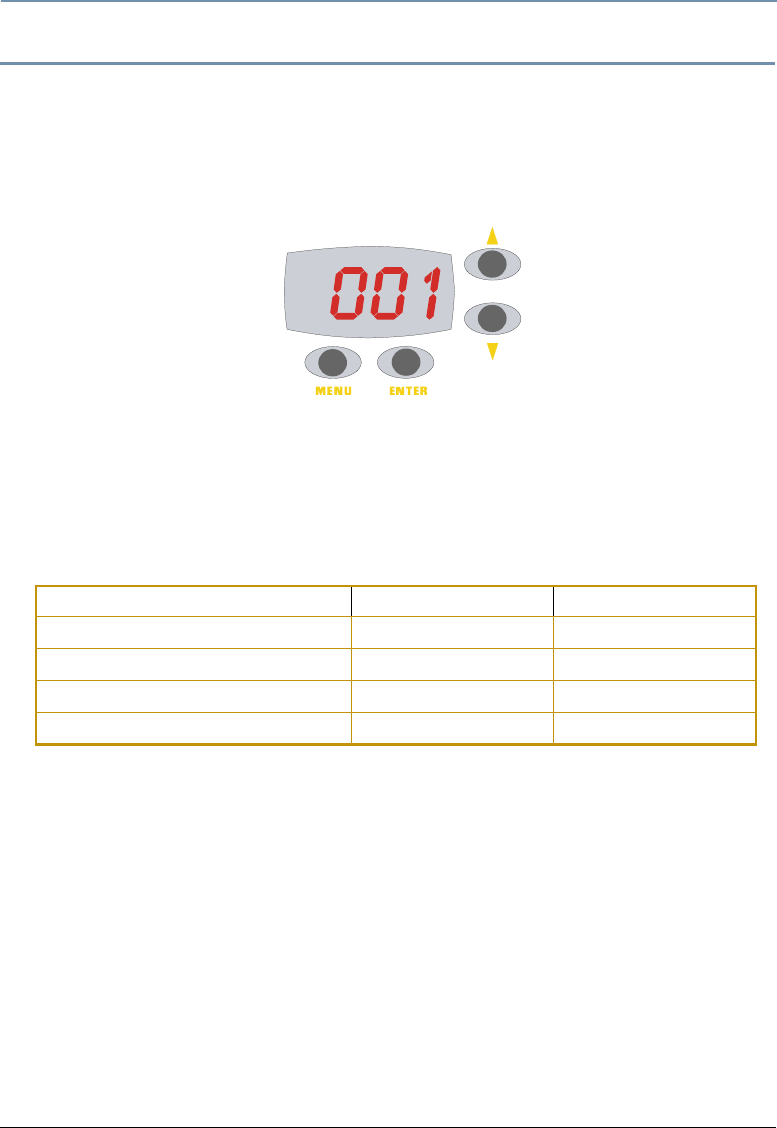
1. Access the fixture’s menu system via the dot matrix display on the fixture’s front panel. For
a detailed description of the menu system, see Chapter 3: The Menu System on page 15.
2. To unlock the menu, press and hold the Menu button until AddR appears on the LED
display. Press the Enter button to select.
3. The display will show the start channel currently assigned to the fixture.
4. Use the Up and Down arrow buttons to select a new DMX start channel. The display will
flash a new option ready for selection.
5. Press the Enter button to store the new DMX Start channel. The display will stop flashing
when a new option is entered.
When setting the Start channel on a fixture, remember:
• A fixture’s physical location on the link does not have to coincide with the order of channel
range assignments in the link.
• The fixture’s channel range must not overlap any other device’s channel range on the link.
When two devices on the same DMX link have overlapping channel ranges, one or both
devices will be disabled or behave erratically. The single exception would be if two or more
fixtures need to respond to controller commands in exactly the same way. In that case,
those fixtures must be the same type and must share the entire channel range.
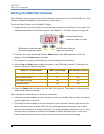
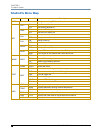
StudioPix™ Protocol Mode DMX Channel Range Last Valid Start Channel
Standard Protocol 70 442
RGB Reduced Protocol 12 501
Pixel Mapping Protocol 192 321
Extended Protocol 253 260
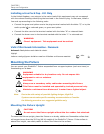
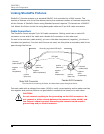
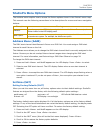
UP and DOWN arrows
scroll to an option or a value
MENU button unlocks the menu
and backs through menu levels
ENTER button selects an
option or a menu value