System Operation 3-21
Setting a new origin other than the default (0,0) position will shrink your field size. If you already
have files already loaded into memory that utilize the entire engraving area, and you set a new
origin, part of that graphic might fall out of the effective printing area. If you run this file,
unexpected results can occur that might destroy your material in the engraving area. We
suggest that you use this feature cautiously and make sure that you do not set a new origin that
would cause you graphic to print off the engraving area.
If you would like to reset the origin back to the original factory settings of (0,0) in the upper left
corner, a quick way to get the motion system back to the upper left corner is to simply press the
up arrow and down arrow keys simultaneously while in this menu.
You will see the carriage move to the upper left hand corner automatically. Again, select “SET
NEW ORIGIN”, then select “YES, SET NEW ORIGIN” and your settings will automatically be
stored in memory permanently.
Focusing the Laser Beam
To properly focus the laser beam onto the surface of the material, you need to perform two
tasks. First position the focus carriage directly above the material and then use the focusing tool
or the digital display to adjust the Z axis table level until the material is at the proper distance
away from the focus lens.
Place your material into the upper left corner of the engraving field against the rulers. From
either the “MAIN” or FILE DISPLAY” menus, press the “Z” button located on the control panel.
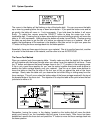
You will observe the focus carriage move to a pre-set focusing position of (1,1). The display will
now show the “CURRENT LENS” that you are using and the current vertical “Z POSITION” of the
engraving table.


