Sample Materials 6-23
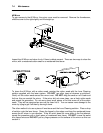
be easier to flood the masking, after engraving, with water. This will loosen the tape and it can
be easily removed by rubbing it off by hand. In the vector cutting example, the wood was
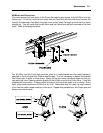
elevated from the table to let smoke and heat escape from underneath. If elevating the wood,
mask and/or dampen the bottom side of the wood very lightly and the water acts as a heat sink
to prevent the underside from flaming and charring. Elevating the wood also helps to determine
whether the laser has passed completely through since the cut pieces will fall through to the
table when cutting is finished. If raising the wood, set up the drawing so that the inner pieces of
the drawing are cut first, otherwise pieces may fall through at the wrong time.
Not all wood finishes are created equal. When ordering wood from a supplier, be sure to specify
that it is being used for laser engraving. Some finishes cannot handle the heat from the laser
and will bubble, blister, and possibly turn white. For engraving softer woods such as pine or
balsa, reduce the power settings to acquire the best depth. Engraving too deep on soft woods
will reduce quality. Every type of wood will engrave differently. It is better to engrave woods that
are finished. If engraving unfinished wood and it is not masked with transfer tape, the smoke
residue tends to embed in the wood and is impossible to remove without sanding. To prevent
this, mask all unfinished wood with transfer tape.
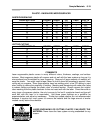
WOOD INLAYS - VENEERS
Create a drawing with no outlines, only filled areas. Engrave the filled areas almost as deep as
the thickness of the veneer (usually about .003 inches (.1 mm) or less). With some water and a
nylon brush, remove all residue from the engraved area. When cutting veneers make sure they
are lying absolutely flat. In the drawing, give the objects an outline of .001 inches (.1 mm) and
remove the fill. Adjust the power so that there is just enough power to cut completely through the
veneer. Overpowering the cut will cause too much material removal and the fit will not be snug.
Some software programs allow outline offsetting to compensate for the thickness of the beam
called contouring. Usually, a contour to the outside of the vector line of .006 inches provides a
tight fit. Remember if using more power to cut through the veneer, compensate for the thicker
width of the laser cut by contouring a little further to the outside.
Another method is to first create your graphic and fill it with the color black. Then give it a white
outline of .012 inches (.3 mm). If you look at the graphic when you add the outline, you will see
that it appears to shrink. Now raster engrave the graphic to a depth slightly shallower than the
thickness of the veneer. When the engraving is finished, place the veneer into the laser system.
Remove the black fill and change the outline to a different color. Cut out the veneer with the
laser system, add glue to the veneer, and apply the veneer into the engraved area of the other
piece of wood and let dry. After the glue has thoroughly dried, sand the veneer until it is flush
with the base wood. A good veneer to use is one with an adhesive backing. Once cut, place the
veneer into its proper place on the engraved wood block and with a clothes iron, and iron the
veneer into the engraved wood. This melts the glue and causes the veneer to stick to the
engraved area. Finish the wood as you desire and the finished product will look fantastic. The
veneer can now be sanded flush with the surface and a finish coat applied.
LASER ENGRAVING OR CUTTING WOOD CAN IGNITE THE MATERIAL.
Never leave the laser system running unattended for any reason.


