


13
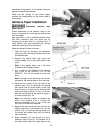
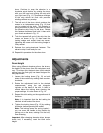
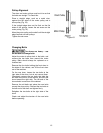
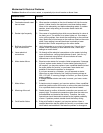
4. Insert a tool, such as a hex wrench or
screwdriver, through the hole on top of the
leadscrew (Fig 18) at that corner of the table
that is lowest.
5. Turn the leadscrew clockwise to raise the
table.
6. When the adjustment is complete, install the
chain over the four sprockets, and over the
chain tensioner roller. Push back the chain
tensioner assembly until proper tension is
achieved, then tighten the socket head cap
screw on the chain tensioner.
7. Install front and rear cover plates.
After this procedure, the pressure rollers should be
checked and adjusted if necessary (see Pressure
Rollers on page 16).
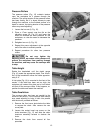
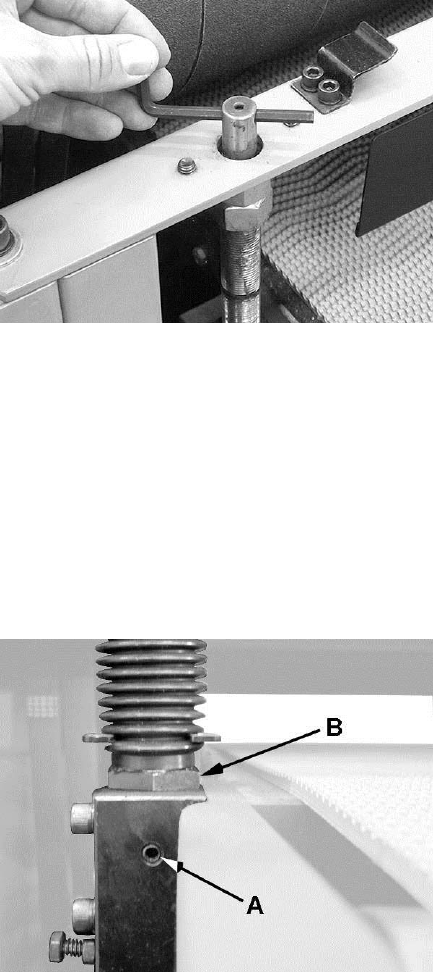
Lead Screw Thread Clearance
Referring to Figure 19 – If adjusting the table
height becomes difficult or if excessive clearance
forms between the lead screws and bushings,
adjustment may be required as described below.
Symptoms
Table wobble is noted
Difficulty is noted in table height adjustment
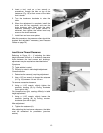
Corrective action
1. Determine the corner(s) requiring adjustment.
2. Use a 1/8" hex wrench to loosen the setscrew
(A, Fig. 19) between 1/4 and 1/2 turn.
To remove excessive clearance
3. Using a 1-1/8" wrench, slightly tighten the
eccentric bushing (B) by turning clockwise
(from right to left).
For clearance too tight, causing difficulty in table
height adjustment
3. Using a 1-1/8" wrench, slightly loosen the
eccentric bushing (B) by turning counter-
clockwise (from left to right).
After adjustment
4. Tighten the setscrew (A).
After adjusting the lead screw clearance, the table
must be rechecked for parallelism (previous
section).
Figure 18
Figure 19