


8
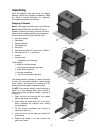
Unpacking
Open the shipping crate and check for shipping
damage. Report any damage immediately. Read
the owner’s manual thoroughly for assembly,
maintenance and safety instructions.
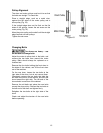
Shipping Contents
Note 1: Some parts are inside a box in the cabinet.
Note 2: Models DDS-225 and DDS-237 Drum
Sanders come from the factory with the first set of
abrasive strips installed with 80 grit sandpaper on
the front drum and 100 grit on the rear drum.
1 dual drum sander
1 handwheel
1 handle assembly
1 handwheel post
2 dust ports
2 open end wrenches (12-14mm and 17-19mm)
4 hex wrenches (2, 3, 4, and 5mm)
1 manual
1 warranty card
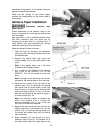
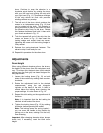
Installation and Assembly
Tools needed
1 forklift or hoist with straps
1 14mm open-end wrench (provided)
1 cross-point screwdriver
1 flat head screwdriver
1 set of hex wrenches (provided)
The sander should be placed in a well-lit area with
a sturdy floor and good ventilation. Leave enough
space around the machine for loading and off-
loading stock and general maintenance work.
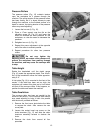
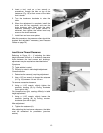
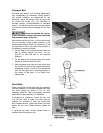
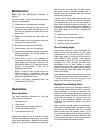
Do NOT lift the sander directly under the drums or
rollers, as it may damage them. Use a forklift to
move the machine as follows (Refer to Figures 3
through 5):
1. Open the door and remove the four screws
holding the sander to the pallet.
2. Move away the wood block (A) at the front,
which protected the machine from shifting
during transport.
3. Tilt the machine backward just enough to
insert wood block (A).
4. Insert the forks into the gap and carefully lift
the machine.
5. Position the sander in its new location and
gently set it down.
Figure 3
Figure 4
Figure 5