


15
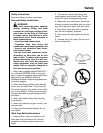
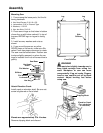
WARNING
Plugging in saw during assembly
could result in electrical shock, or
severe cuts from contact with spinning
blade.
Do not plug in saw at any time during
assembly.
Plug in saw only when it is to be used.
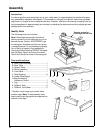
Assembly Steps
It is important for your safety and to get
accurate cuts that you put the saw together
according to these instructions. Follow these
steps in order.
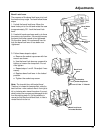
Assembling steel legs
For easy assembly it is recommended to fin-
ger tighten all screws, lockwashers, and hex
nuts until the legset is fully assembled. Then
go back and tighten all nuts securely.
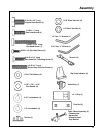
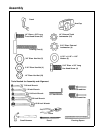
From among the loose parts, find the follow-
ing Hardware:
24 Truss Head Screws, 1/4-20 x 5/8
24 Lockwashers, 1/4-External
24 Hex Nuts, 1/4-20
8 Hex Nuts, 3/8 - 16
4 Leveling Feet
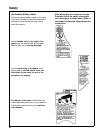
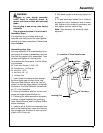
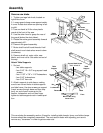
1. Insert three truss head screws through
the three holes near the top of one Leg.
Place the Side Stiffener up to the Leg, as
shown, so that the three screws line up with
the holes in the Side Stiffeners marked with
an "X" in the illustration.
2. Place a lockwasher and hex nut on each
screw and finger tighten the hex nut.
3. Followingthesameprocedureasabove,
continue to fasten together the remaining
Legs, Side Stiffeners, and Front/Rear Stiffen-
ersasillustrated.
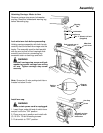
4. Install one 3/8-16 hex nut completely onto
each of the leveling feet. Insert one leveling
foot through hole in bottom of each leg and
install a 3/8-16 hex nut.
X = Location of Truss Head Screws
Leveling Foot
3/8" Hex Nuts
Truss Head
Screws
Front/Rear
Stiffener
Side
Stiffener
Assembly
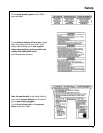
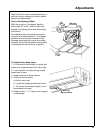
5. Set stand upright and securely tighten all
nuts.
6. To level steel legs, loosen nut on inside of
leg and turn nut on outside to raise or lower
feet. Adjust all four levelers if necessary, and
then tighten nuts on inside of leg.
Note:
These levelers are not intended for height
adjustment.