


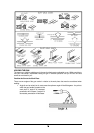
13. Pull the trigger on the welding gun to feed the wire through the gun assembly.
WARNING
ARC FLASH CAN INJURE EYES!
To reduce the risk of arc flash, make certain that the welding wire, when it finally
comes out of the end of the gun, does not touch the ground clamp or any grounded
piece of metal.
14. When at least an inch of wire sticks out past the end of the gun, release the trigger.
15. Select a contact tip stamped with the same wire diameter as the diameter of the wire being
used.
16. Slide the contact tip over the wire (protruding from the end of the gun), thread it into the end of
the gun, and hand tighten securely.
17. Install the nozzle on the end of the gun assembly.
18. Cut off excess wire that extends more than 1/4" past the end of the nozzle.
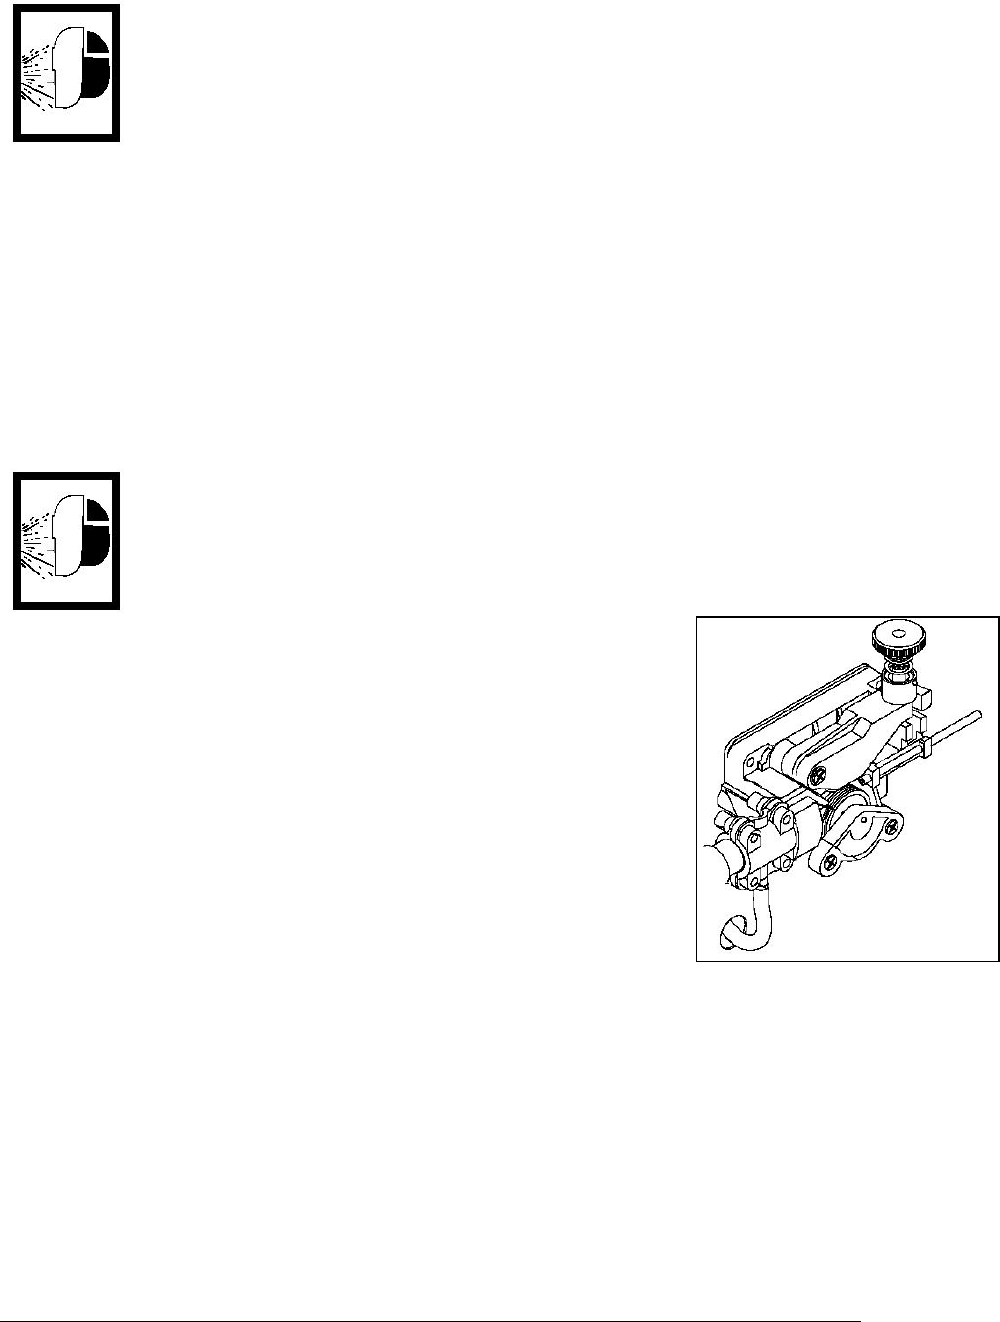
SET THE WIRE DRIVE TENSION.
WARNING
ARC FLASH CAN INJURE EYES!
• To reduce the risk of arc flash, make certain that the welding wire, when it finally
comes out of the end of the gun, does not touch the ground clamp or any grounded
piece of metal during the drive tension settling process.
1. Pull the trigger on the gun.
2. Turn the drive tension adjustment knob clockwise, increasing the drive
tension until the wire seems to feed smoothly without slipping.
3. Block the end of the nozzle by holding it up against something that
doesn't conduct electricity, such as a block of wood or a concrete floor,
then trigger the gun again. The wire should slip at the drive roller. If the
wire bird-nests at the drive roller, decrease the drive tension by turning
the drive tension adjustment knob counterclockwise and try again after
rethreading the welding wire. When set correctly, there should be no
slippage between the wire and the drive roller under normal conditions,
but if an obstruction occurs along the wire feed path, the wire should
then slip on the drive roller.
OPERATION
GETTING TO KNOW YOUR NEW WELDER
Whether or not you have welded before, it is important that you become familiar with your welder, its
controls, and the results achieved at different settings. We strongly recommend that you practice with
your new welder on scrap metal, trying a variety of heat settings, base metal thicknesses, and welding
positions for each type and size of wire that you will be using. By doing this you will gain a feel for how
changes in these welding variables affect the weld.
If you have not welded before, you will need to develop welding skills and techniques as well. The self-
taught welder learns through a process of trial and error. The best way to teach yourself how to weld is
with short periods of practice at regular intervals.
Do not attempt to weld on any valuable equipment until you have made practice welds on scrap metal
that can be discarded. The scrap metal should be of the same type and thickness as that of the item
10