


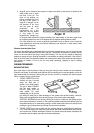
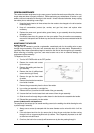

5. Lower your welding helmet and pull the trigger on the gun to start an arc, then begin to drag
the gun toward you while turning down on the WIRE SPEED control knob at the same time.
6. Listen! As you decrease the wire speed, the sound that the arc makes will change from a
sputtering to a smooth, high-pitched buzzing sound and then will begin sputtering again if you
decrease the wire speed too far — very similar to tuning in a radio. The points on the WIRE
SPEED control where this high-pitched buzzing sound is achieved is the best-sounding
range.
You can use the wire speed control to slightly increase or decrease heat and penetration for a given
heat setting by selecting higher or lower wire speed settings within the best-sounding range.
Repeat this tune-in procedure if you select a new voltage setting, a different diameter wire, or a
different type of wire.
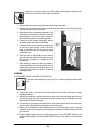
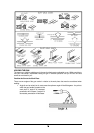
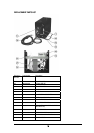
CONNECT WELDER GROUND
Attach the ground clamp to the work piece making sure that the work piece is cleaned of dirt, oil, rust,
scale, oxidation, and paint at the point of connection. It is best to connect the ground clamp directly to
the work piece and as close to the weld as possible. If it is impractical to connect the ground clamp
directly to the work piece, connect it to metal that is securely attached to the work piece, but not
electrically insulated from it. Also, make sure this other metal is of similar or greater thickness than that
of the work piece.
CAUTION!
RISK OF ELECTRONIC COMPONENT DAMAGE!
If the ground clamp is being connected to an automobile or other equipment with on-board computer
systems, solid state electronic controls, solid state sound systems, etc., do not weld until
disconnecting the cable from the battery that is attached to chassis ground. Failure to do so may result
in electronic component damage!
12