


GENERAL WELDING INFORMATION
PREPARATIONS FOR WELDING
An important factor in making a satisfactory weld is preparation. This includes studying the process
and equipment and then practice welding before attempting to weld finished product. An organized,
safe, convenient, comfortable, well lighted work area should be available to the operator. The work
area should specifically be free of all flammables with both a fire extinguisher and bucket of sand
available.
To properly prepare for welding, it is necessary to:
1. Prepare an organized, well lighted work area
2. Provide protection for the eyes and skin of the operator and bystanders.
3. Set up the work piece and make the ground clamp connection.
4. Select the electrode.
5. Turn the power switch on.
SETTING UP THE WORK PIECE
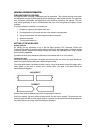
Welding Positions
Arc welding can be performed in any of the four basic positions: Flat, Horizontal, Vertical and
Overhead. Flat welding is generally easier, faster, and allows for better penetration. Overhead welding
is the most difficult. Vertical and overhead welding are usually only attempted when using a welder
with dc welding capabilities.
If possible, the work piece should be positioned so that the bead will run on a flat surface.
Preparing The Joint
For effective welding, the surfaces to be joined must be free of dirt, rust, scale, oil or paint. Welding on
metals not properly cleaned will cause a brittle and porous weld.
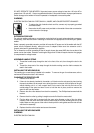
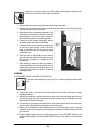
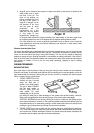
If the base metal pieces to be joined are thick or heavy, it may be necessary to bevel the edges, with a
metal grinder, at the point of contact, as in shown below. The angle of the bevel should be
approximately 60 degrees.
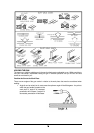
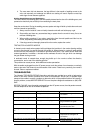
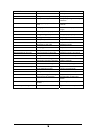
See the chart below for detailed instructions for preparing the weld joint.
During the welding, the work pieces will become hot and will tend to expand. The expansion may
cause the pieces to shift from the regular position. If possible, the work pieces should be clamped into
the position they are to occupy when the welding is completed.
13