


4. The more worn this hole becomes, the less efficient is the transfer of welding current to the
wire, and eventually arc breakage and difficult arc starting will result. Replace contact tips
when signs of wear become apparent.
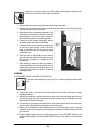
Welding Nozzle Maintenance and Replacement
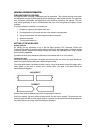
The nozzle directs the shielding gas to the weld puddle, determines the size of the shielding area, and
prevents the electrically hot contact tip from contacting the work piece.
Keep the nozzle clean! During the welding process, spatter and slag will build up inside the nozzle and
must be cleaned out periodically.
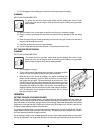
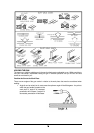
1. Always coat the inside of a new or freshly cleaned nozzle with anti-stick spray or gel.
2. Stop welding and clean any accumulated slag or spatter from the nozzle for every five to ten
minutes of welding time.
3. When welding overhead, if any molten metal drips from the weld puddle and falls into the
nozzle, stop welding immediately and clean the nozzle.
4. If the slag cannot be thoroughly cleaned from the nozzle, replace the nozzle!
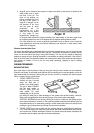
TESTING FOR A SHORTED NOZZLE
A shorted nozzle results when spatter build-up bridges the insulation in the nozzle allowing welding
current to flow through it as well as through the contact tip. When shorted, a nozzle will steal welding
current from the wire whenever it contacts the grounded work piece. This causes erratic welds and
reduced penetration. In addition, a shorted nozzle overheats the end of the gun which can damage
the gas diffuser and/or gun neck.
A restricted nozzle is created when enough slag builds up in the nozzle to affect the direction,
concentration, and or rate of the shielding gas flow.
This problem can cause porous, brittle welds and reduce penetration.
With the welder unplugged from the AC power source, touch the probes of an ohmmeter or continuity
tester to the end of the contact tip and the outside of the nozzle. If there is any continuity, the nozzle is
shorted. Clean or replace as needed.
TROUBLESHOOTING
The following TROUBLESHOOTING information and tables are provided as a guide to help resolve
some of the more common problems that could be encountered. Should you or qualified repair
personnel be unable to resolve a problem or determine which of the possible solutions will remedy a
specific problem, contact WELDER SERVICE for over-the-phone diagnostic assistance at: (800) 458-
6447.
BEFORE CALLING, have the welder unplugged from the AC power source, the side panels removed,
and the telephone as near to the welder as possible.
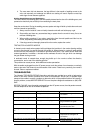
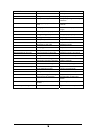
SYMPTOM POSSIBLE CAUSE REMEDY
Wire feed works, but no arc Bad ground or loose connection Check ground or tighten all
connections
Nothing works - power light not on Power switch faulty Replace power switch
Faulty power cord or plug Replace power cord or plug. Verify
plug connections are good.
Tripped wall circuit breaker/fuse Reset breaker or replace fuse and
check breaker/fuse size
Nothing works but the power light is
on
Loose or bad connection Check and lighten connection
Low output or non-penetrating weld Loose connection inside of machine Blow inside of machine out with
compressed air and tighten all
connections
Low output or non-penetrating weld Poor ground connection Reposition clamp and check cable
to clamp co
nnection
17