Maintenance
6–30
THS710A, THS720A, THS730A & THS720P Service Manual
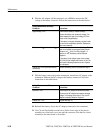
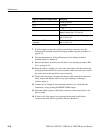
8. With the AC adapter still disconnected, use a DMM to measure the DC
voltage at the battery connector. Follow the instructions in the table below.
Voltage Measurement at Battery
Connector
Instructions
Approximately 0 V
DC
Check that the battery is installed correctly.
Remove the battery and measure its voltage. You
should measure an open-circuit voltage >4.8 V
DC
across a fully charged battery.
If the battery is charged, the battery contacts inside
the back cover are probably defective. Replace the
back cover assembly.
Greater than 0 V
DC
but less than 4 V
DC
Remove the battery and measure its voltage. The
open-circuit voltage across a good battery should
measure >4 V
DC
, even if not fully charged.
.
If it
remains <4 V
DC
, the battery may be defective.
Replace it.
If the battery is fully charged (open-circuit voltage
>4.8 V
DC
) but the voltage under load is <4 V
DC
, the
main board is drawing excessive current. Replace
the main board.
Greater than 4 V
DC
(check both mating
connectors)
Remove the battery and then proceed with step 9.
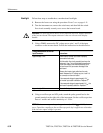
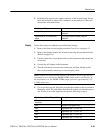
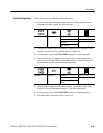
9. With the battery removed from the instrument, reattach the AC adapter to the
instrument. Measure the DC voltage at the battery connector. Follow the
instructions in the table below.
Voltage Measurement at Battery
Connector
Instructions
Less than 1 V
DC
Check that the AC adapter is connected correctly.
Disconnect the AC adapter and measure its output
voltage. If the voltage is less than 12 V
DC
, the AC
adapter is probably defective. Replace it.
Greater than 1 V
DC
Proceed with step 10.
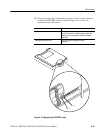
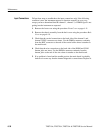
10. Reinstall the battery. Leave the AC adapter connected to the instrument.
11. Use a
1
@
8
inch flat-bladed screwdriver to lift the lower edge of the chassis
assembly out of the back cover just until the connector from the flex-circuit
assembly to the main board is accessible.


