


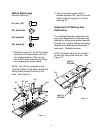


16
Figure 8
Attach Height-Adjustable Legs
(Model 6155 Only) (continued)
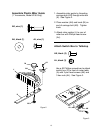
1. Mount four long legs (F) to table using
four pan head screws (AJ) and four
toothed washers (AP) per leg. Use a
#3 Phillips screwdriver to keep from
stripping the screw heads. See
Figure 7.
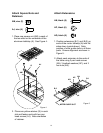
2. Use 2 pan head screws (AN), 2
toothed washers (AP), and 2 hex nuts
(AQ) to attach a support (C or D) to
each long leg (F).
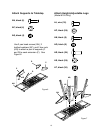
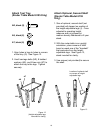
3. Decide what height you want your
Router Center table to be from the
floor.
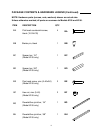
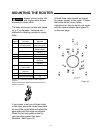
4. With the "foot" of short legs (E-1)
pointing upward, align 2 holes in short
leg with 2 holes in long leg at
appropriate height. See Figure 8.
NOTE: Short legs (E-1) mount to the
inside of long legs (F).
AS
AT
E-1
AR
F
5. Thread 4 carriage bolts (AR) through
the holes in both leg members.
Assemble 1 toothed washer (AS) and
1 hex nut (AT) to each bolt.
Tighten nuts.
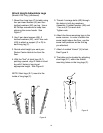
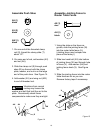
6. Attach the three remaining legs in the
same manner. In order to obtain the
same height above the floor, use the
same hole positions as the first leg
you attached.
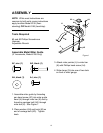
7. Attach 4 molded "shoes" (U) to feet.
See Figure 9.
8. The table can be leveled by adjusting
short legs (E-1) within the slotted
mounting holes on the long legs (F).
U
Figure 9