


20
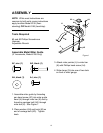
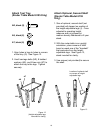
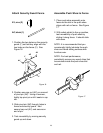
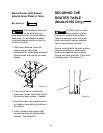
Attach Security Guard Fence
AY, zinc (2)
AZ, black (1)
1. Position the two holes on the security
guard (Y) so that they align with the
two holes on the fence (V). See
Figure 16.
V
Y
AY
AZ
AY
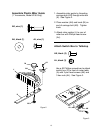
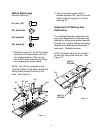
Assemble Push Shoe to Fence
1. Place push shoe assembly onto
fence so the slot in the push shoe
aligns with rail on fence. See Figure
17.
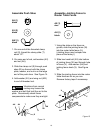
2. With safety shield in the up position,
test moveability of push shoe by
sliding it along fence. It should slide
with ease.
NOTE: It is recommended that you
occasionally lightly lubricate the push
shoe and fence sliding surfaces with
furniture wax.
NOTE: For best performance,
periodically remove any wood chips that
accumulate inside the push shoe slot
and rail.
2. Position one cap nut (AY) on one end
of pivot pin (AZ). Using a hammer,
lightly tap pivot pin until it seats in cap
nut.
3. Slide pivot pin (AZ) through holes in
fence and security guard. Add
second cap nut (AY) and secure on
end of pin.
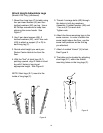
3. Test moveability by moving security
guard up and down.
Figure 16
Figure 17