


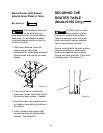


33
Using the Router for Beading
and Edge Cutting
1. Loosen the knobs that hold the fence
in place.
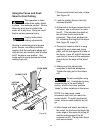
2. Position the fence for the desired
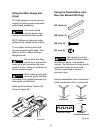
cutting depth. See item 3 in Figure
33.
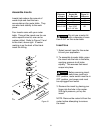
1. Tabletop
2. Fence
3. Cutting depth
4. Workpiece
5. Successive cut
6. Depth of cut
7. Router bit
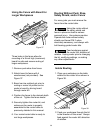
Using Ball-Bearing-Guided Bits;
Veining, Fluting, and Grooving
To help reduce the
chance of injury, make
sure the fence is as close as possible to
the ball-bearing-guided bit. Move the
fence back ONLY enough to permit the
ball-bearing-guide to control the depth
of cut.
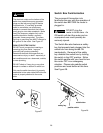
WARNING
3. Tighten the knobs securing the fence
in place.
4. Swing the safety shield over the
router bit.
5. Your router/router table is now ready
for use.
NOTE: Remember to always feed the
workpiece against router bit's direction
of rotation. Test on scrap wood before
making final cuts.
The edge of the workpiece that slides
along fence must be straight and true
for best results. (Use scrap to test
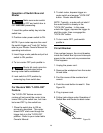
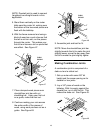
settings.) See Figures 33 and 34.
1. With the router bit set at the required
depth, position and secure the fence
behind the bit at a distance
determined by the previous cut.
Lower safety shield.
2. Slide the workpiece against the
fence. Adjust fence for subsequent
cuts.
NOTE: For deep work, make successive
cuts until you reach the correct depth.
To avoid overloading router, remove
waste material as you go.
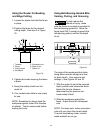
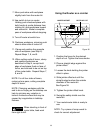
Figure 34
1
2
3
4
7
5
6
Figure 33