


Troubleshooting & Diagnostics
Module Replacement Procedures
68
Troubleshooting
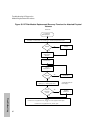
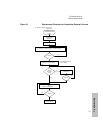
DF Disk Module Replacement/Recovery Procedure for Unattached Physical Volumes (HP
9000 Series 800 with Strict Mirroring)
Before you begin, review and ensure the requirements described in the “DF Disk Module Replacement
Requirements” are met. Use this procedure if the volume group is not active or if the physical volume is
unattached.
Step 1
a. Replace the disk module if you have not done so already.
b. Perform ioscan on the replaced disk module to ensure that it is accessible and to check that it is a
proper replacement.
If you follow the example under “Example of a Disk Module Failure”, the host will display:
# ioscan /dev/dsk/c2t4d0
Step 2
Restore the LVM configuration/headers to the replaced disk from your backup of the LVM configuration:
# vgcfgrestore -n <volume group name> character device file
For example, the host will display:
# vgcfgrestore -n /dev/vg00 /dev/rdsk/c2t4d0
If the host fails during Step 2
If the host fails during this step, repeat this step to ensure all of the configuration data is written to the
new disk.
Step 3
Attach the new disk module to the active volume group with the vgchange command:
# vgchange -a y <volume group name>
For example, the host will display: # vgchange -a y /dev/vg00
Note for MC/ServiceGuard - If the disk array is used in an MC/ServiceGuard cluster volume
group, the appropriate activation mode should be used. For example, vgchange –a e
/dev/vgcluster
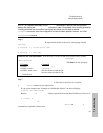
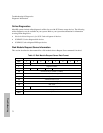
The appropriate activation mode can be determined by the value of the VG Status from the vgdisplay:
VG Status* Command
Available vgchange –a y
Availble, exclusive vgchange –a e
Available, shared, server Not sure what to do with SLVM
Available, shared, client Not sure what to do with SLVM
*available may have a state specified after it (e.g. available/state)