


LN-23P
INSTALLATION
A-3A-3
Return to Section TOC Return to Section TOC Return to Section TOC Return to Section TOC
Return to Master TOC Return to Master TOC Return to Master TOC Return to Master TOC
INPUT CABLE:
For K316L-1 (6 pin connector)
The standard 25 foot input cable between the LN-23P
and the power source (with a K350 Adapter Kit) con-
sists of a six-conductor control cable and a 1/0 elec-
trode cable. The control cable has lugged leads on the
power source end and a polarized plug on the wire
feeder end.
With the power source turned off, install the input
cable per the following instructions:
• Connect the end of the control cable with the lugged
leads to the K350 or K350-1 Adapter Kit. Connect
the electrode cable to the negative output stud on
the power source.
NOTE: If two LN-23Pʼs are connected to an Adapter
Kit, connect the feeder that will be used at the low-
est voltage setting to Feeder “A” terminal strip in the
K350. If only one LN-23P is used, connect it to
Feeder “A” terminal strip.
• Connect the input control cable polarized plug into
the mating 6 pin receptacle on the rear of the con-
trol section of the LN-23P. Tighten the threaded
locking collar until the connector is completely seat-
ed.
• Unclip the rubber retaining strap that holds the wire
enclosure cover in place and remove the cover.
Push the wire drive section door latch towards the
rear of the LN-23P and open the door. Route the
electrode cable through the large rubber grommet
in the rear of the wire feed section and connect the
lug to the brass conductor block at the front of
motor-gearbox assembly using the bolt provided.
Attach the control cable strain relief hook to the
bracket on the frame of the LN-23P.
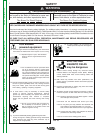
SAFETY PRECAUTIONS
ELECTRIC SHOCK can kill.
• Only qualified personnel should per-
form this installation, maintenance
and troubleshooting work.
• Turn off the input power at the fuse box before
working on other equipment connected to the
welding system at the disconnect switch or fuse
box before working on this equipment.
• Do not touch electrically hot parts.
------------------------------------------------------------------------
WARNING
For K316L-2 or higher (8 pin connector)
With the power source turned off, install the input
cable per the following instructions:
• The K316L-2 LN-23P can be connected directly to
any Lincoln power source that has CV output. and
Twist-Mate weld terminals (V350, V350-PIPE, CV-
305, etc..), using the control cable provided with the
machine.
• Connect the 14-pin connector and Twist-Mate plug of
the input cable assembly to the front of the welder.
• Unclip the rubber retaining strap that holds the wire
enclosure cover in place, and remove the cover.
Push the wire drive section door latch towards the
rear of the LN-23P and open the door. Route the
electrode cable through the large rubber grommet in
the rear of the wire feed section and connect the lug
to the brass conductor block at the front of the motor
gear box assembly using the bolt provided. Attach
the control cable strain relief hook to the bracket on
the frame of the LN-23P.
• Connect the 8-pin receptacle to the LN-23P located
on the back underside of the control box.
WORK CABLE AND REMOTE VOLTAGE
SENSING WORK LEAD
• Connect a work cable of sufficient size and length,
per the following table, between the proper output
stud on the power source and the work. Be sure the
connection to the work makes tight metal to metal
contact.
Above cable sizes are based on a maximum voltage drop of
4.3 volts in the combined lengths of electrode and work cable
at 350 amps.
•
Connect a 12 AWG or larger rubber covered flexible
lead physically suitable for the installation to the
voltage sensing work lead (#21) coming from the
Adapter Kit. For convenience, wrap this voltage
sensing lead around the work lead and tape in
place. Connect it directly to the work or to the work
cable connection . This lead supplies voltage to the
voltmeter as well as power to the LN-23P control
circuitry and drive motor.
Electrode Work Copper Copper
Cable Cable Electrode Work Cable
Length Length Cable Size Size
0-25 ft. 0-75 ft. 1/0 1/0
0-25 76-125 1/0 2/0
26-75 26-75 2/0 2/0
26-75 76-125 2/0 4/0
76-100 76-125 3/0 4/0