


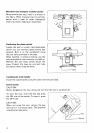

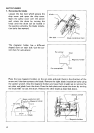

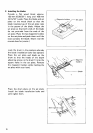
Adjusting the fence angle
I
ClamD
screw
(A)
7
Hex bolts
(A)
The fence angle can be adjusted
at
any
angle from
0’
to 45’. Loosen the clamp
screws
(A)
and
(B)
and pull the fence out
slightly. Then tighten the clamp screws (A)
and
(B).
Loosen the hex bolts
(A)
and
(B)
and
tilt
the fence according to your work.
Then tighten the hex bolts
(A)
and
(B)
securely.
-Fence
bolts
(6)
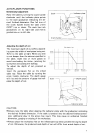
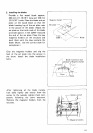
Operation
Placement of hands during feeding
At the start
of
the cut, the left hand holds the workpiece firmly down on the infeed table
and firmly against the fence. The right hand pushes the workpiece toward the blades.
After the cut has started, the new surface rests firmly on the outfeed table. The left hand
should press down on this part well away from directly over the cutterhead,
at
the same
time maintaining flush contact with the fence. The right hand presses the workpiece
forward and before the right hand passes over the cutterhead
it
should be cautiously
moved to the workpiece on the outfeed table.
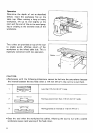
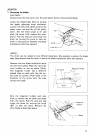
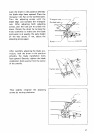
Jointing an edge
Set the fence square with the table. Hold
the best fece of the workpiece firmly
against the fence throughout the feed. Side
pressure
is
required to keep the workpiece
in flush contact with the fence. This
is
very
important when jointing wide workpiece.
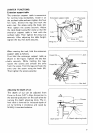
Surfacing
For surfacing, press the workpiece down
against the outfeed table. Surfacing or
planing
a
wide work surface on
a
warped or
twisted board
is
very difficult to accom-
plish. Hold-down/push blocks be useful in
all
cases.
They should always be used when
surfacing workpieces thinner than
76.2
mm
(3”).
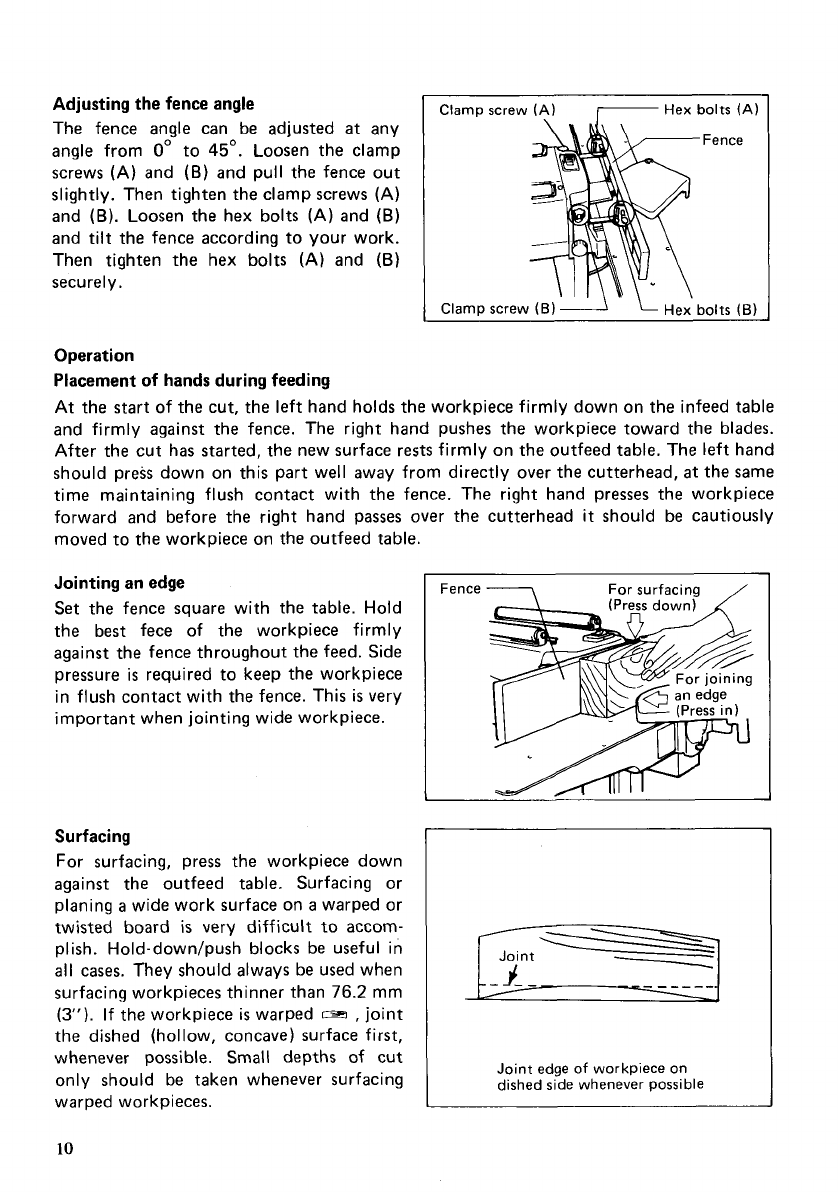
If the workpiece
is
warped
m
,
joint
the dished (hollow, concave) surface first,
whenever possible. Small depths of cut
only should be taken whenever surfacing
warped workpieces.
Fence
L-1
Joint
I
Joint edge of workpiece on
dished side whenever possible
10