


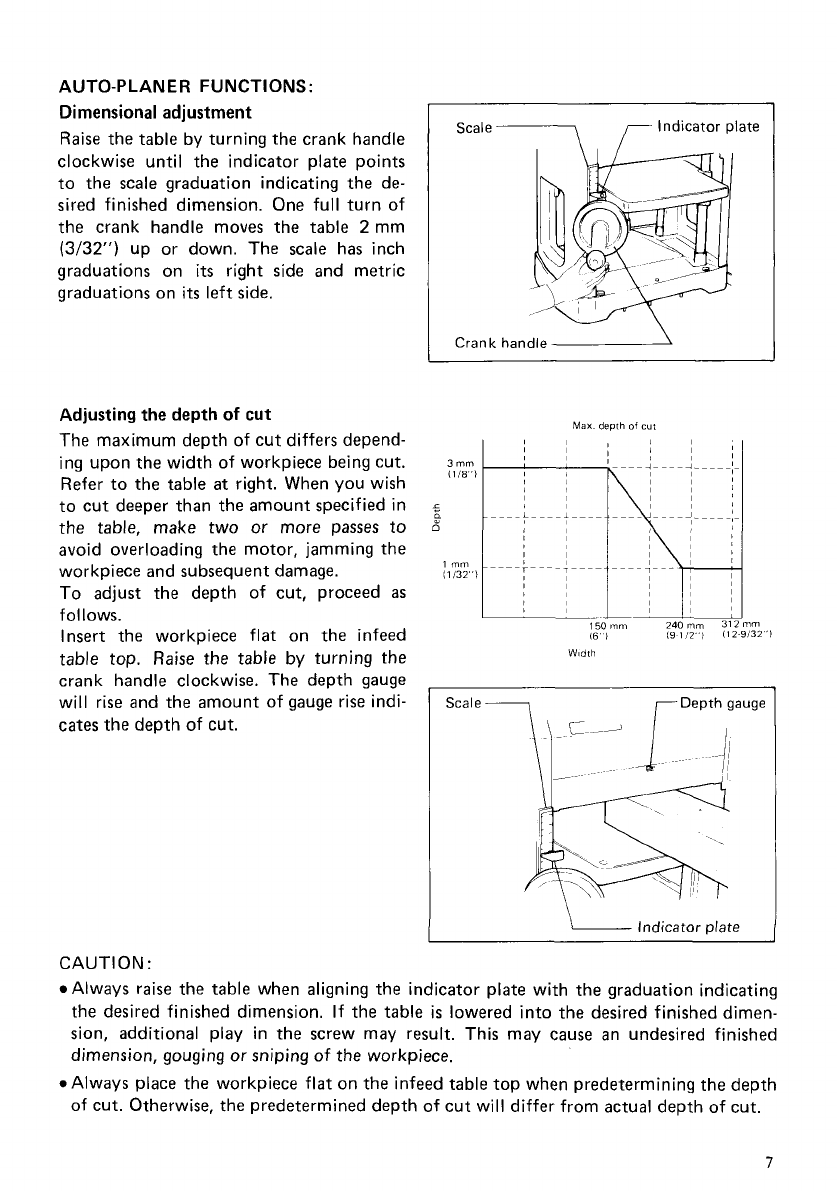
AUTO-PLANER FUNCTIONS:
Dimensional adjustment
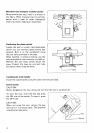
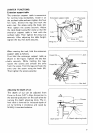
Raise
the table by turning the crank handle
clockwise until the indicator plate points
to the scale graduation indicating the de-
sired finished dimension. One full turn of
the crank handle moves the table
2
mm
(3/32")
up or down. The scale has inch
graduations on
its
right side and metric
graduations on
its
left side.
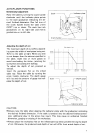
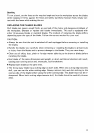
Adjusting the depth
of
cut
The maximum depth
of
cut differs depend-
ing upon the width of workpiece being cut.
Refer to the table
at
right. When you wish
to cut deeper than the amount specified in
the table, make two or more passes to
avoid overloading the motor, jamming the
workpiece and subsequent damage.
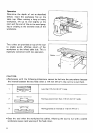
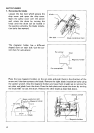
To adjust the depth of cut, proceed
as
follows.
Insert the workpiece flat on the infeed
table top.
Raise
the table by turning the
crank handle clockwise. The depth gauge
will rise and the amount of gauge rise indi-
cates the depth of cut.
I
Scale-\ Indicator plate
I
Crank handled
3
mm
(1
18")
s
d
1
"
(1132"l
Max
demh
of
cut
150"
16
I
Width
nm
132"l
Scale
7
&\'
Indicator plate
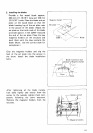
CAUTION
:
Always raise the table when aligning the indicator plate with the graduation indicating
the desired finished dimension.
If the table
is
lowered into the desired finished dimen-
sion, additional play in the screw may result. This may cause an undesired finished
dimension, gouging
or
sniping of the workpiece.
*Always place the workpiece flat on the infeed table top when predetermining the depth
of cut. Otherwise, the predetermined depth of cut will differ from actual depth of cut.
7