


36
How to Use Your RIDGID Wood Lathe (continued)
Making Standard Cuts
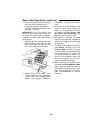
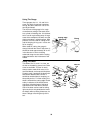
The Roughing-off Cut
Reducing a square or odd-shaped work-
piece down to a cylinder of approximate
size for finish turning is called “Roughing-
off”. Faceplate turning and large diameter
spindles should first be partly reduced by
sawing but small spindles are easily turned
down entirely with the large (3/4-in.) gouge.
Start the first cut about 2-in. from tailstock
end - then run it toward the tailstock and
off the end of the workpiece. Next, start
another cut 2-in. nearer the headstock -
and run it, also, toward tailstock, to merge
with first cut. Continue in this manner until
2- to 4-in. from the headstock end, then
reverse the direction of tool travel and
work one or two cuts in succession
toward the headstock, and off this end of
the workpiece. NOTE: Never start a cut
directly at the end -if the chisel catches
the end, it will damage the workpiece.
Never take long cuts while corners remain
on the work, as this tends to tear long sliv-
ers from the corners.
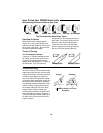
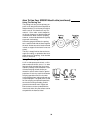
The first series of cuts should not be too
deep. It is better to partially reduce the
work to a cylinder all along its length; then
start a second series of cuts to complete
reducing it to a cylinder. Once a cylinder
has been formed, step lathe up to the next
faster speed. Further reductions in size
can now be carried out by cutting as
deeply as desired at any spot along the
work. At this stage, long cuts, from the
center off either end, can also be taken.
Roughing-off generally is continued until
the cylinder is approximately 1/8-in larger
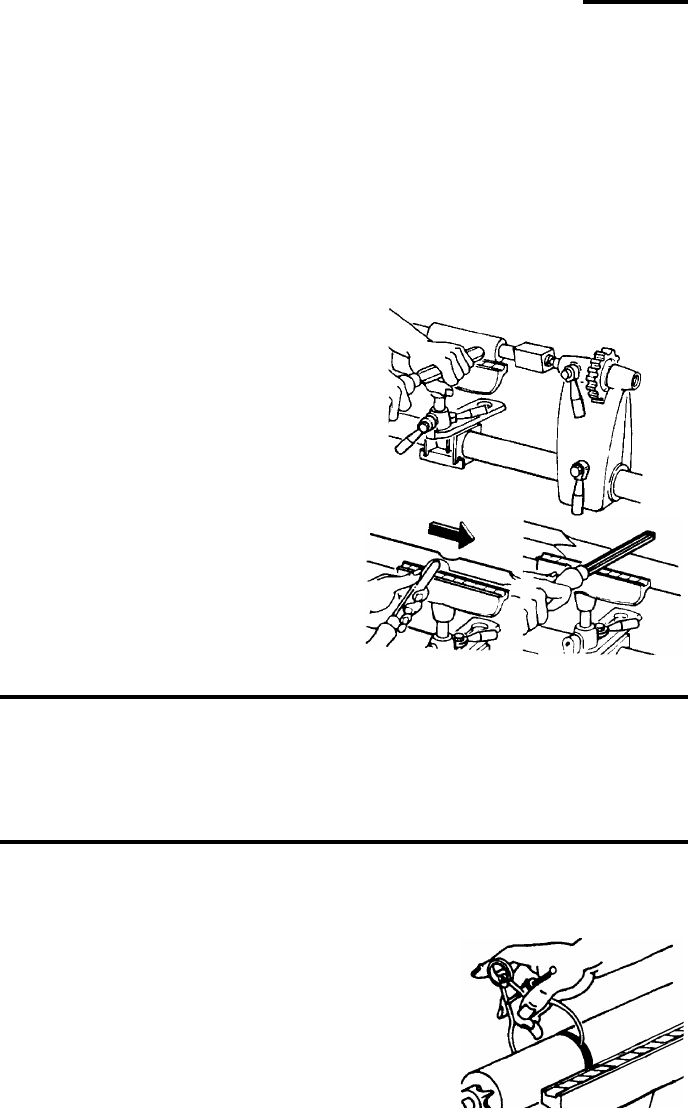
than the desired finish size. Roundness
can be tested by laying the gouge on top
of the work - it will not ride up and down
when cylinder is perfectly round.
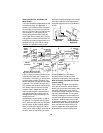
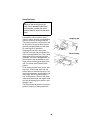
Rough-cutting To Size
The roughing-off cut can be made to
accurately size the cylinder to a given
diameter.
Another method is to make a number of
sizing cuts at intervals along the work,
then use the gouge to reduce the whole
cylinder down to the diameter indicated by
these cuts.
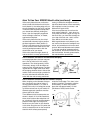
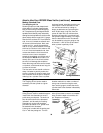
Making Sizing Cuts
Sizing cuts are useful to establish approx-
imate finish-size diameters at various
points along a workpiece. The work can
then be turned down to the diameters
indicated - and be ready for finishing.
Diameters for sizing cuts should be
planned to be about 1/8-in. greater than
the desired finish diameters.
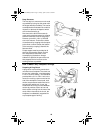
A sizing cut is made with the parting tool.
Cut “in” with the parting tool. Turn the
lathe off and allow to come to a complete
stop. Check the depth of cut with a cali-
per. Repeat as necessary..
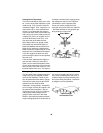
First Cuts
Testing Roundnes
s
Checking
Sizing Cut
Diameter