


36 37
36 37
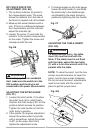
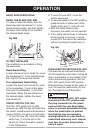
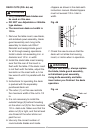
● The workpiece must have a
straight edge against the fence
and must not be warped, twisted,
or bowed when ripping.
1. Remove the miter gauge and store it
in the “storage” compartment in the
base of the saw.
2. Secure the rip fence to the table.
3. Raise the blade so it is about 1/8 in.
higher than the top of the workpiece.
4. Place the workpiece flat on the table
and against the fence. Keep the
workpiece away from the blade.
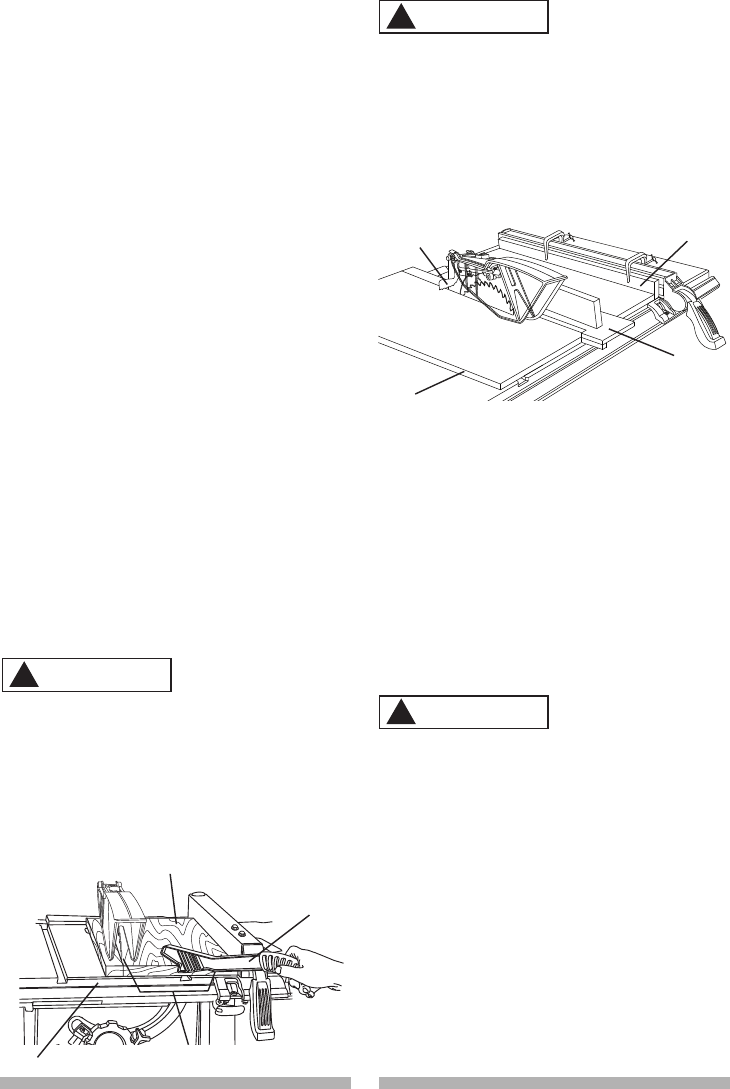
5. Turn the saw ON and wait for the
blade to come to full speed.
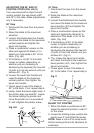
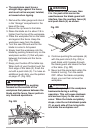
6. Slowly feed the workpiece into the
blade by pushing forward only on the
workpiece section (1) that will pass
between the blade and the fence.
(Fig. QQ)
7. Keep your thumbs off the table top.
When both of your thumbs touch the
front edge of the table (2), finish the
cut with a push stick (3). To make an
additional push stick, use the pattern
on page 47. (Fig. QQ)
AVOID KICKBACK by pushing
forward on the section of the
workpiece that passes between the
blade and the fence. Never perform
any freehand operations.
Fig. QQ
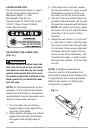
WARNING
!
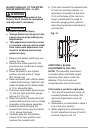
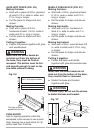
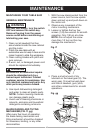
When width or rip narrower than
2 in. the push stick cannot be
used because the blade guard will
interfere. Use the auxiliary fence (4)
and push block (5) as shown.
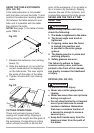
Fig. RR
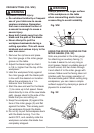
8. Continue pushing the workpiece (6)
with the push stick (3-Fig. QQ) or
push block until it passes through
the blade guard and clears the rear
of the table. (Fig. RR)
9. Never pull the piece back when the
blade is turning. Turn the switch
OFF. When the blade completely
stops, you can then remove the
workpiece.
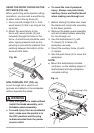
Never attempt to pull the workpiece
backwards during a cutting
operation. This will cause kickback
and serious injury to the user can
occur. When the blade completely
stops, raise the anti-kickback pawls
(7) on each side of the riving knife
and slide the workpiece out.
WARNING
!
6
4
5
7
WARNING
!
1
3
2
6