


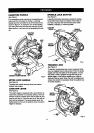
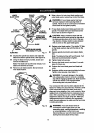


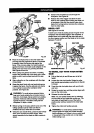
FENCE PIVOT ADJUSTMENTS
COMBINATION
MITER SQUARE
TABLE
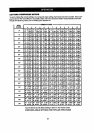
VIEWOFBLADENOTSQUAREWITHMITER
TABLE,ADJUSTMENTSAREREQUIRED
Fig.23
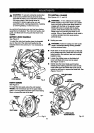
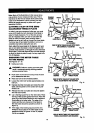
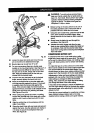
• Usinga 10 mm wrench or adjustablewrench,
loosen the lock nut secudngpositivestopadjust-
ment screw.Also loosenbevel lockknob.
• Adjustpositivestopadjustmentscrewto bdng
sew blade intoalignmentwiththe square. See
F/gum 24.
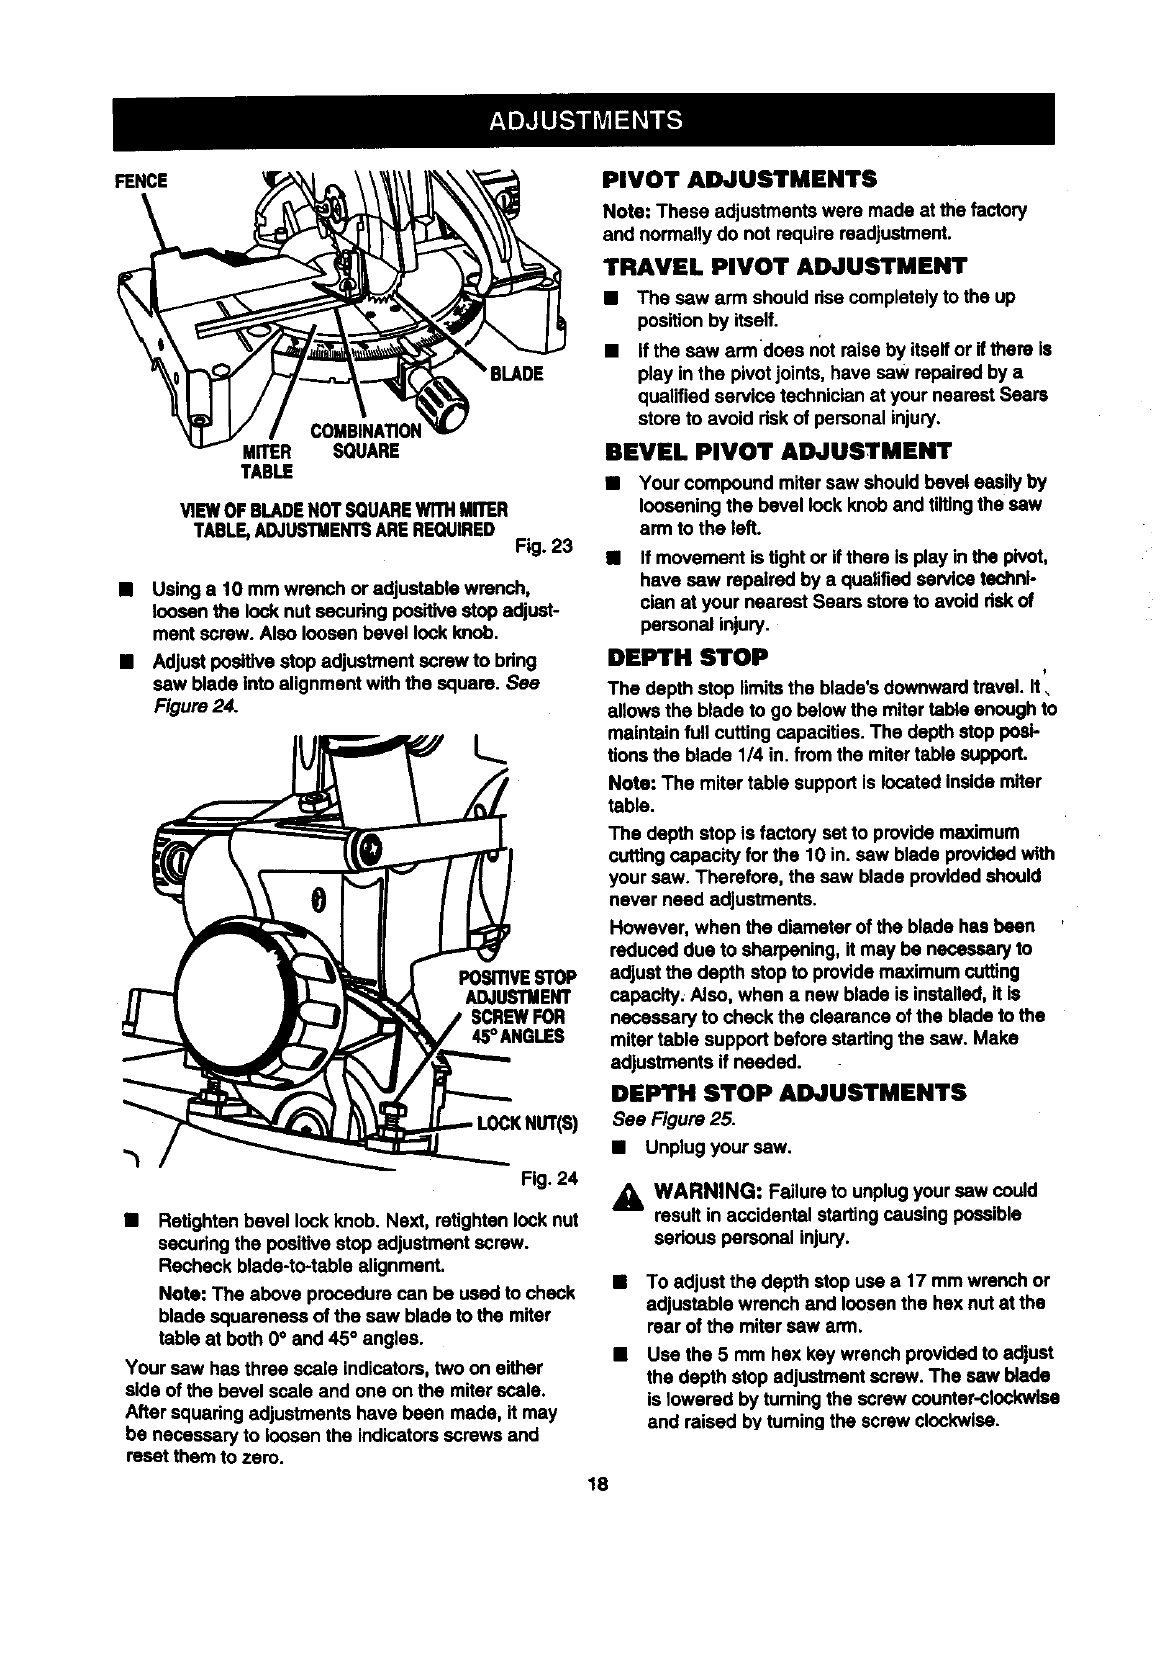
POSITIVESTOP
ADJUSTMENT
45°ANGLES
Fig.24
• Retightenbevel lock knob. Next, retighten locknut
securingthe positivestop adjustmentscrew.
Recheck blede-to-table alignment.
Note: The above procedurecan be usedto check
blade squarenessof the saw bladeto the rarer
table at both 0° and 45° angles.
Your sew has three scale indicators,twoon either
side of the bevel scale and one onthe miterscale.
After squaringadjustmentshave been made, it may
be necessaryto loosen the indicatorsscrewsand
resetthem tozero.
Note: These adjustmentswere made at the factory
and normallydo not requirereadjustment.
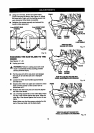
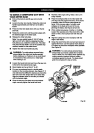
TRAVEL PIVOT ADJUSTMENT
• The saw arm shouldrisecompletelyto the up
positionby itself.
• If the sew armdoes notraise by itselfor ifthere is
play in the pivotjoints, have saw repaired bya
qualifiedservice technicianat yournearest Sears
store toavoid riskof personalinjury.
BEVEL PIVOT ADJUSTMENT
• Your compoundmiter saw shouldbevel easilyby
looseningthe bevel lock knoband tiltingthe sew
armto the left.
If movement istight or ifthere is playin the pivot,
have saw repairedby a qualifiedservicetechni-
cian at your nearest Sears store to avoiddskof
personal injury.
DEPTH STOP
I
The depth stop limitsthe blade'sdownwardtravel. It,
allowsthe blade to go below the mitertable enoughto
maintainfull cuttingcapacities. The depthstop posi-
tionsthe blade 114in. from the mitertable support.
Note: The miter table supportis locatedinsidemiter
table.
The depthstop is factory setto providemaximum
cuttingcapacity for the 10 in. sew blade providedwith
yoursaw. Therefore, the saw blade providedshould
never need adjustments.
However, when the diameterof the bladehas been
reduced due to sharpening, it may be necasseryto
adjustthe depth stop toprovidemaximumcutting
capacity. Also, when a new bladeis installed,it is
necessary tocheck the clearance ofthe blade tothe
miter table support beforestartingthe saw. Make
adjustmentsif needed.
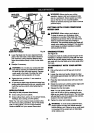
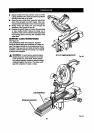
DEPTH STOP ADJUSTMENTS
See Figure25.
• Unplug yoursaw.
_k WARNING: Failureto unplugyour saw could
resultin accidentalstartingcausing posaible
serious personalinjury.
To adjust thedepth stopuse a 17 mmwrench or
adjustablewrench and loosenthe hex nutat the
rear ofthe mitersew arm.
Use the 5 mm hax key wrench providedtoadjust
the depth stop adjustmentscrew. The saw blade
islowered by tuming the screw counter-cloctoNIse
and raised byturningthe screwclockwise.
18