


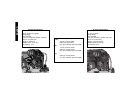

6
English
purchased at your local hardware or electrical
supply store. Follow the cord plug manufacturer
installation procedures, contact your local D
EWALT
Service Center, qualified electrician or call 1-800-
4-D
EWALT for proper procedures to install the plug.
The compressor must comply with all local and
national electrical codes after the 230 volt plug is
installed.
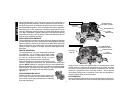
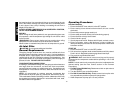
The compressor with the 230 volt plug should only be connected to
an outlet having the same configuration as the plug illustrated.
MOTOR REQUIREMENTS
UNITS WITHOUT A DUAL VOLTAGE SWITCH
WARNING: Make sure motor is disconnected from the power
source before rewiring motor leads.
The motor supplied with your compressor is a dual voltage, 115 / 230
volt motor. If it is desired to operate your compressor at 230 volts,
single phase, it is necessary to reconnect the motor leads in the motor
junction box by following the instructions given on the motor
nameplate. If unsure on how to reconnect the motor leads contact
your local D
EWALT Service Center or qualified electrician for proper
procedures to install the plug.
WARNING: Make sure that the 230 volt cord plug end is properly
connected before operating in 230 volt mode.
UNITS WITH A DUAL VOLTAGE SWITCH
WARNING: Make sure that the 230 volt cord plug end is properly
connected before operating in 230 volt mode.
The motor supplied with your compressor is a dual voltage, 115/230
volt motor. If it is desired to operate your compressor at 230 volts,
single phase, simply move the 115/230 volt switch to the 230 volt
position.
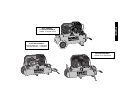
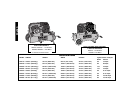
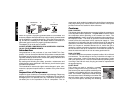
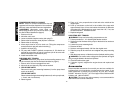
DUAL CONTROL
(D55390, D55395, D55570, D55575, D55580, D55585)
NOTE: Unit must remain running while performing the following
adjustments
WARNING : Aftercooler, pump head, and surrounding parts are
very hot; do not touch. (see the Hot Surfaces identified on page 2)
WARNING - Moving Parts: Keep your hair, clothing and gloves
away from moving parts. Loose clothing, jewelry, or long hair can be
caught in moving parts. Air vents may cover moving parts and should
be avoided as well.
Stop Start Mode
1. Turn compressor on. If the tank has been fully charged,
bleed air from the drain valves until pump starts.
2. Turn knob on top of pilot valve (H) clockwise until fully
closed.
WARNING : Over tightening of this knob can cause
damage to the pilot valve.
3. Allow compressor to reach cut out pressure. If
compressor does not stop, drain the tank(s) until
compressor begins to charge the tank(s) and readjust
pilot valve knob.
Constant Run Mode
1. Turn compressor on. If the tank has been fully charged, bleed air
from the drain valves until pump starts.
2. Turn knob on top of pilot valve (H) fully counter-clockwise until fully
open.
WARNING : Over loosening of this knob can cause damage to the
pilot valve.
3. Verify that the unit is in a constant run mode. If compressor shuts
off, adjust pilot valve to a lower cut out pressure until unit continues
to run.
H