


12
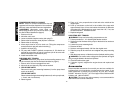
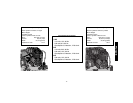
COMPRESSOR PUMP OIL CHANGE
NOTE: Pump oil contains substances that are
regulated and must be disposed of in accordance
with local, state and federal laws and regulations.
WARNING: Aftercooler, pump head, and
surrounding parts are very hot; do not touch. (see
the Hot Surfaces identified on page 2)
1. Ensure unit is off.
2. Allow the unit to cool.
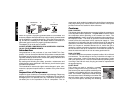
3. Locate a suitable container under drain plug (P).
4. Remove the knurled filler knob (M) from crankcase.
5. Remove the oil drain plug.
6. Allow ample time for all oil to drain out. (Tilting the compressor
towards the drain plug will assist in draining.)
7. Install the oil drain plug.
8. Fill pump with D
EWALT synthetic compressor oil. Oil should not
exceed top raised line on side of crankcase (oil will be even with
bottom of threads in crankcase fill port).
9. Install knurled filler knob.
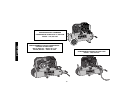
CHECKING BELT TENSION
WARNING: Aftercooler, pump head, and surrounding parts are very
hot; do not touch (see the Hot Surfaces identified on page 2).
1. Ensure unit is off and unplugged from wall.
2. Allow unit to cool down so pump can be touched.
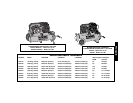
3. FOR K PUMP UNITS
Remove six belt guard mounting fasteners (2 on the pump head
and 4 on the deck)
FOR G PUMP UNITS
Remove seven belt guard mounting fasteners (2 on the pump head,
1 J-hook, and 4 on the deck)
4. Remove guard.
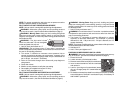
5. Place a 12" ruler perpendicular to belt and at the middle of the
longest span.
6. Push up and down on the belt in the middle of the span with
approximately 8 lbs. of force and notice the amount of deflection
using the ruler. Belt should not move more than 1/2"; if so, see
ADJUSTING BELT TENSION section.
7. Replace belt guard
ADJUSTING BELT TENSION
WARNING: Pump and surrounding components are hot.
1. Follow procedures 1 - 4 in checking belt tension section.
2. Scribe a mark at the base of the pump on the deck to be used as a
reference.
3. Loosen four pump mounting bolts.
4. Remove the belt.
5. Scribe a mark approximately 1/8" from the original mark.
6. Slide the pump to the new mark and retighten the pump mounting
bolts.
7. With the pump secure, roll the belt over the flywheel and the pulley.
WARNING: Use caution when rolling belt onto flywheel as fingers
can get caught between the belt and flywheel.
8. Check the belt tension again.
9. If tension is good, retighten the engine brace and replace belt
guard.
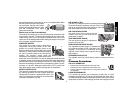
Accessories
Recommended accessories for use with your tool are available for
purchase from your local dealer or authorized service center. If you
need assistance in locating any accessory for your tool, contact:
D
EWALT Industrial Tool Co., 701 East Joppa Road, Baltimore,MD
21286 or call 1-800-4-D
EWALT.
CAUTION: The use of any other accessory not recommended for
use with this tool could be hazardous.
English
M
P